Showing posts with label Cakes. Show all posts

Feb 9, 2015

Strawberry Mousse Cake


     I was tempted to make this cake after I saw it in one of my buddy blogger's blog, Full Scoops. The procedures proved to be easy and the cake looked too beautiful. It was loaded with strawberry flavour and my kids quite loved it. I used a vanilla sponge cake as base instead of chocolate cake, but made the strawberry mousse from fresh ripe strawberries and the cake became history in no time :)


Strawberry Mousse Cake Recipe

Ingredients
  • Cake - one 9" vanilla cake
  • Heavy Whipping Cream - 1.5 cups
  • Vanilla extract - 1 tsp
  • Strawberry puree - 1.5 cups
  • Granulated sugar - 2 tbsp (or to taste)
  • Icing Sugar - 1 tbsp (for the whipped cream)
  • Lemon juice - 1 tsp
  • Gelatin - 3 tsp
  • Cold Water - 3 tbsp
  • Strawberries - to decorate (optional)
Method:

Prepare the vanilla cake in a 9" spring form pan. I made it using the same recipe of vanilla cup cake. but halved the ingredients and poured the batter in a 9" pan and baked for 1/2 an hour. When the cake was done, let it cool in the pan itself.

For the mousse


1. Place  1.5 cups of heavy whipping cream in a large bowl. Leave the bowl (with the cream) and beaters in the fridge and freezer respectively.


2. Add 3 tsp gelatin to 3 tbsp water and let it bloom for 5 minutes. Then heat the gelatin in a microwave or saucepan for 30 seconds. Set this aside to cool completely.

3. You will need about 30-35 strawberries. Roughly chop the berries add the strawberries to the blender or food processor and puree without adding water.

4. Transfer the puree to a saucepan and add 2 tbsp of sugar and 1 tsp lemon juice and stir until the sugar is dissolved. Add the cooled jelatin to it and stir the puree for 3-5 minutes until it's slightly thickened.

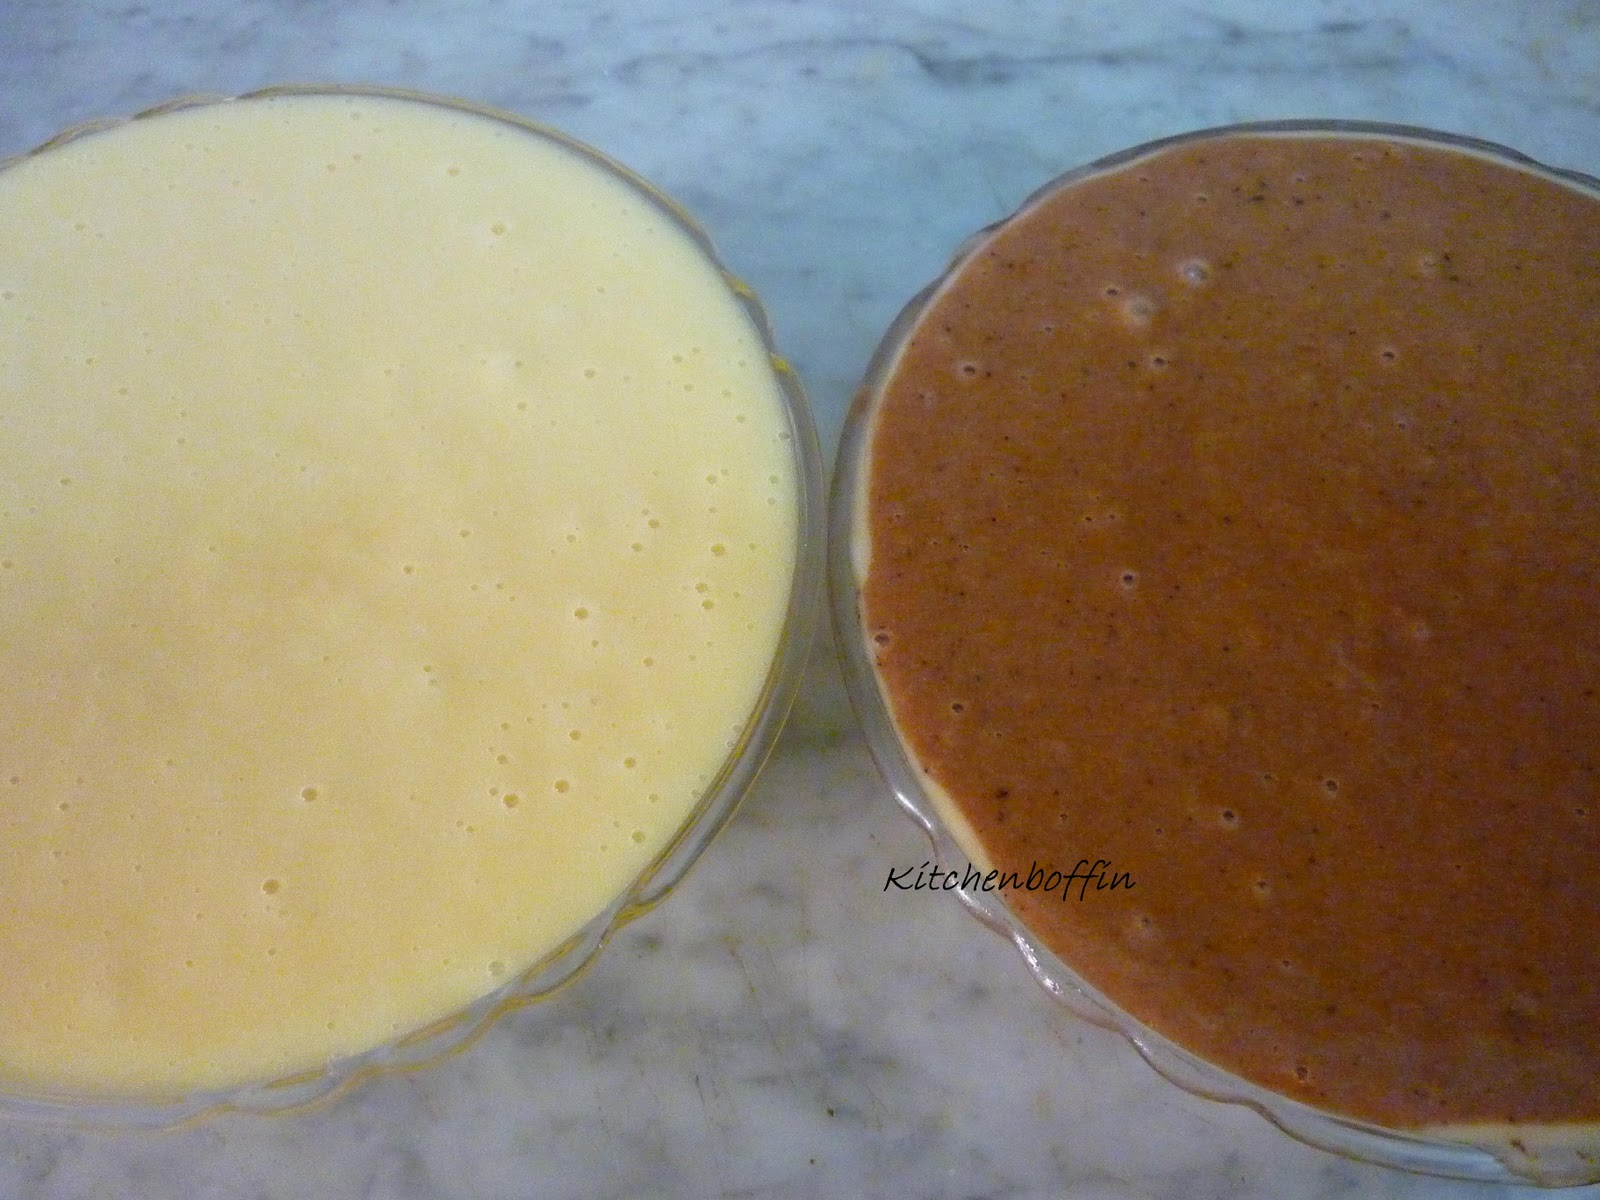
5. While the puree cools prepare the cream. Make sure the bowl, beaters and the cream is chilled.

5. Add the vanilla extract and 1 tbsp sugar to the cream and whip for about 7-8 minutes until stiff peaks are formed. Do not overbeat.

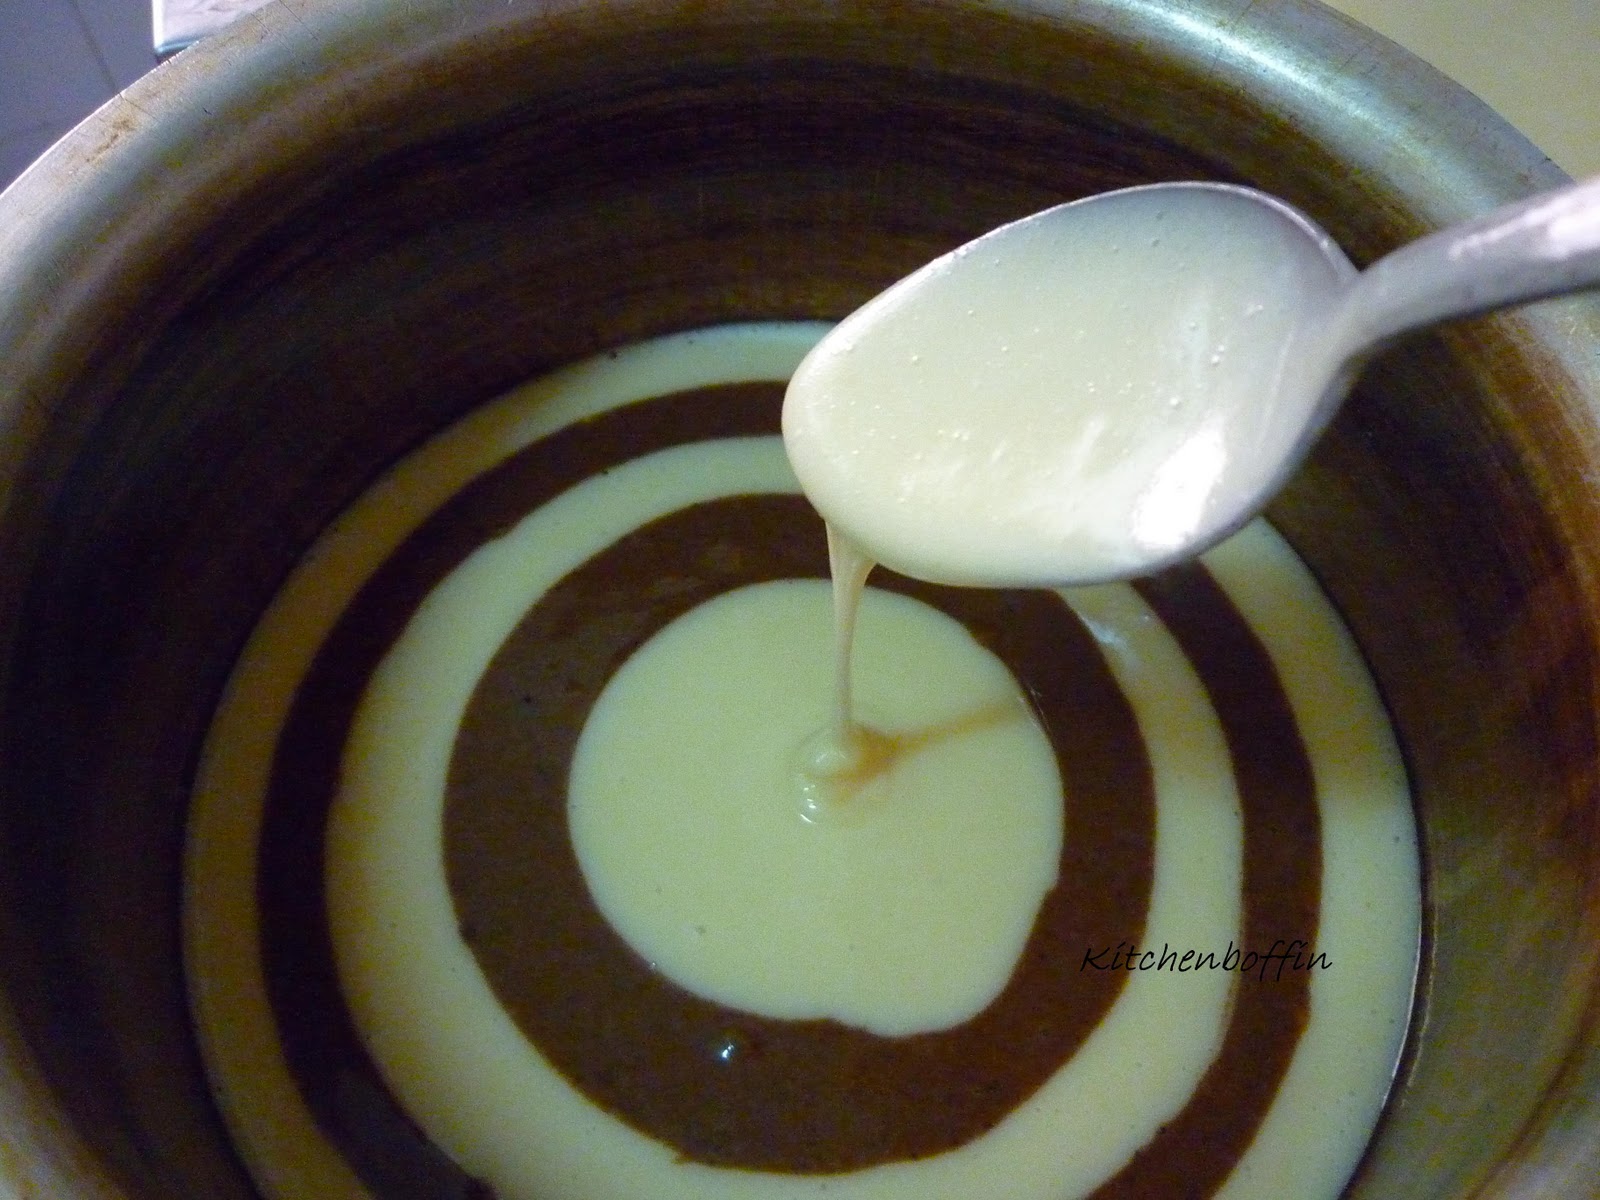
6. As you beat the cream, about 5 minutes into beating, you will start seeing beater marks .At this stage add the cooled strawberry puree with gelatin and fold gently. Set this aside

7. Place parchment paper around the spring form pan over the sponge cake to line the sides of the pan. Pour the cooled strawberry cream into the pan over the cake.

8. Cover the cake pan and let it set in the refrigerator for a minimum of 4 hours.


9. Once the mousse sets, remove the ring of the spring form pan gently and top with some strawberries.

10. Cut and serve the cake in individual serving plates. Enjoy!!

Jan 12, 2015

Moist Chocolate Mug Cake


               Easy recipes  have their own beauty. They are more so, for super busy moms like me. Believe it or not, this recipe was so easy that I hadn't expected it to turn out good, when I first saw it in this gorgeous blog. I had never guessed there was an easy way to make a chocolate cake; without all those whipping, beating and folding processes. And I was not so optimistic as to the outcome of a cake in the microwave, as the one time I had attempted it before had given me something like a sweet spongy dough.

            But  Julie's  words as well as her pictures tempted me enough to try it out. After all it was just a matter of 5 minutes. Amazing enough, incredible enough, so unbelievable, it turned out to be a moist soft chocolate cake, which the boys fought over. I have made it again 3 or 4 times, since the first attempt. It has become one of my latest time saver desserts. Try this out for your kids and you wouldn't be disappointed.

Moist Chocolate Mug Cake
(Recipe adapted from Table for two)

1/4 cup all purpose flour
2 tbsp unsweetened cocoa powder
1/4 tsp baking powder
3 tbsp powdered sugar
a pinch of salt
1/4 cup milk
2 tbsp veg.oil
1 tbsp Nutella

Method:

  1. In a medium bowl, whisk together all the dry ingredients.
  2. Whisk in the milk and oil and mix well until well combined and no clumps are seen.
  3. Pour batter into a micro wave safe large coffee mug.
  4. Drop 1 tablespoon of  Nutella or any other chocolate spread in the middle of the batter. No need to push it down.
  5. Microwave mug cake for 1 minute on high.
  6. Remove from microwave and serve hot or cold. Enjoy!

May 25, 2014

Zucchini Cupcake

 
            It was one of the busiest weeks in my life. I was on a roller coaster ride of life where you literally forget to breath. After all life could never be so idle when you have three kids (Well, I mean four!! Grown up ones can  be more insisting) around. Juggling between cooking, sewing, blogging, reading and lot more kids stuff which you would probably not find in the dictionaries; is what recently life is like. I call myself lazy no more. You just don't have space for that word in my 60 miles/hr marathon life. Aaah!! I think you can of course hear me panting.. just halting a bit to take breath!!

            Still!! I am enjoying it on the go!! I seriously can't imagine life with a lower pace. I guess it's all part of the fun. I am just trying to enjoy an ice lolly on the ride... After all roller coaster rides are meant to be fun. And of course it is!! If you take it in the positive sense :)


           So, I'm posting the recipe of Zucchini cupcake I had made a few months back. It is one of the latest additions to my kids menu,which helps me sneak in veggies to their veggie resistant tummies. Gosh! The boys never suspected, their enemies were hiding right under their noses; and the cakes were gone, before I even knew it. Try this for your kids, if yours are Yuck! Yuck! towards veggies too.. A sure shot to success; believe me;)


Here is the recipe...

Apr 9, 2014

Lemon Cake with Lemon Glaze


              Kids can be really fussy when they are hungry. And they decline to eat whatever we offer during such tantrums. They prefer something sweet and junk. Most of the time we cannot give in to their persistence and the situation need to be tackled with diplomacy. But there are times when you have to do some misgivings, if you really like to have a calm atmosphere in the home.

             Nowadays whenever my elder one gets such hunger pangs in the evenings, all he prefer is cakes,cup cakes and nothing else. He is so much fond of cakes; big or small, iced or not, that I find myself baking cakes every now n then. As it is much easier to bake and serve cup cakes that most of the time cup cakes is that which blooms in my oven. But they get finished off too quickly that you hardly get anything left to store for future use.

            In fact, the Zucchini cup cakes I baked last week got polished off pretty fast that I thought it would be wise to bake a large cake so that  the boys would have enough for three to four days. This time I tried a cake of very different flavour.. Lemon Cake! Tangy, sweet and impressive.. it was devoured by the whole family. I iced it with lemon glaze, which complimented well with the cakes flavour; though the son didn't much like it due to its tanginess. But he loved the cake nevertheless and ate it scraping off the glaze. The cake was a little tart on the first day, but the next day it tasted  perfect. The tanginess had thankfully subsided and the cake was soft and flavourful.

You would like to see the Recipe? Go ahead.

Mar 12, 2014

Strawberry Cake with Cream cheese frosting


            We had plenty of strawberries from the market and they were so ripe that they couldn't be stored for long. Apart from giving to the kids to munch, I had to do something about them, fast. It nagged me that it has been a long time since I made a real frosted cake. In fact I hadn't even used the turn table and offset spatula which Mr. KB gifted me last year. He had begun throwing comments into the air that there was no sign of any cake nor of his presents anywhere. And the elder boy was always complaining that I don't make him cakes as I used to be.. So I decided to give it a go as I couldn't tarnish my image with a few jibes of the males in the family; if I could help it. I was going to prove that after all it's just a piece of cake ;)


                 When I suggested strawberry cake, the son was more than happy. He loves frosted cakes like anything and he loves strawberries too. Often we get him frosted cakes from the nearby confectionery and when he is told that the cakes at the confectioneries are not good,he would reply, "Then you better make them at home because I'm gonna need them very often". So I knew I wouldn't be able to get way without baking cakes for them for long...


                Of course Mr.KB's presents were a great help. If you have the necessary stuff, frosting cake is a cake walk. I really enjoyed doing it this time unlike older times when I would start sweating over just the thought of frosting a real cake. I made a medium cake, cut it into three equal layers with a long serrated knife (which comes really handy while layering a cake) and frosted with cream cheese..


                   It's better not to mention the fights between the boys to lick the spatula in between frosting! Well, I must warn all mothers with little kids around, who plans to frost a cake. This is the most common technical difficulty you are going to encounter while frosting a cake!!
                The boys were somewhat pacified by the promise that the spatula would be given to one and the bowl to the other, to lick ;after I am done with frosting.
            And you are not actually human if you don't dip your finger in the bowl of cream cheese yourself and  put it in your mouth at least once while you frost the cake !! So you get the other technical difficulties!! Keep these in mind and you shall frost your cake with great zeal...Good luck ;)

Jun 20, 2012

Moist Banana Cake


          Climate in the G.C.C has become all the more horrible. The sun is sizzling at degrees above 50 and you could literally fry an egg on the foot path. Taking kids to the park or going for a walk is out of the question. To top it all, there is the lingering episodes of summer colds and fever spiced up with sore throat and tonsillitis. The boys were down with fever and it made dreams of cooling the air with the air conditioner shattered to vapours pieces. Now, where have I heard something like 'between sea and the serpent'? So it was impossible to cook up anything new, nor was I in the mood for experimenting after culinary fads.. The hot weather and temper together with the sickness made me wee bit lax and lethargic. So I thought of posting something I have had in the draft for a long time. Banana cake is something you can rely on when the time is a bit scarce.


         If there is anything which I used to make every weekend, it is the banana cake. There are two reasons. Firstly, it is very quick and easy to whip up the batter and secondly it always helps to use up the over ripe, pitiful looking bananas which dwell on the corner of the kitchen, declined to be eaten by even my banana lover son. So, almost always, the last one or two bananas of the week, ends up as a cake and finally in the tummy of whoever declined to eat those bananas (queer, aint it?). It is one of the cakes, which always came out good for me. The addition of vegetable oil instead of butter makes it all the more moist and soft. It is a bit different from the banana bread, I posted sometime back and uses cinnamon for flavouring instead of nutmeg. You can see that cinnamon and banana blend well for a delicious flavour. Sometimes it takes the simplest ingredients to make a most delicious blend of flavours and here is an example. If you like to have a nutty bite to the cake, feel free to throw in some walnuts or pecans. Here I have left it plain.. just a delicate whiff of banana and cinnamon. Simplicity wins....., I guess :)

Moist Banana Cake

Things you need:


(To make a medium cake enough for 8 to10 persons)

2 cups (260g)all purpose flour
4 large eggs
1 1/2 cups (300g) powdered sugar
1 cup (240ml) veg.oil/canola oil
2 ripe bananas, peeled and smashed
1 tsp baking powder
1/2 tsp baking soda
1 tbsp ground cinnamon
1/2 tsp vanilla essence
1/2 tsp salt

Method:

1.Preheat oven to 180 degreeC (350 degree F) and place rack in center of the oven. Butter a medium cake pan and line the bottom with parchment paper.

2.Peel and mash the bananas in a mortar or in the blender. In a separate bowl, whisk together the flour, baking powder, baking soda, salt and ground cinnamon.

3.In a bowl, beat the eggs until frothy (about 1 minute). Gradually add the sugar and beat until the batter is thick and light coloured (abt 3-4 min). Add the oil in a steady stream and then beat in the vanilla extract. Now fold in the flour mixture and mashed bananas with a rubber spatula until just combined.

4.Transfer the batter to the lined baking pan and bake for 45 minutes to 1 hr at 180 degree C.

5.Remove from oven when done or when a skewer inserted into the center come out with out crumps and let cool on a wire rack. After about 5 to 10 minutes, invert the cake carefully onto the wire wrack and cool completely.

6.Serve sliced with tea or coffee. Enjoy!

This cake goes to Favorite Cake Recipes event at Swathi's Zesty South Indian Kitchen.

May 6, 2012

Carrot Cake


                 I had made a small carrot cake last week  and  it got polished off pretty fast. So I am planning to make another one (this time bigger) so that I can take it to my friends' place too.
               Last week we had guests. Mr.KB had some of his friends coming over for tea and one of them, I was told, hates anything with chocolate. And we had done with a lot of fritters and fingerfoods that week. So Iwas not in a mood to make anything fried. Baking was the preferable option which looked out. Thought of making brownies. That was when the 'no chocolate' bell rang in my head. So what should I bake then? I had been planning to make carrot cake for a while and had a bunch of fresh and juicy carrots resting in peace in my refrigerator too. They were taken out from their undisturbed abode and transformed into carrot grates to make the subject of talk yummy.


           I was a little apprehensive as to how it may taste. A cake that tasted like a bunch of cooked carrots was definitely a No No. I even pictured Mr.KB's friend telling him with a grimace that he preferred chocolate to vegetable cakes. Had a mind to throw in some nuts, but decided otherwise later. Fingers crossed, I waited for the cake to rise and get done.. and my nose flared to pick even the slightest hint of that 'cooked vegetable smell' which may erupt from the oven. What reached my nostrils instead was cinnamon and something sweet. So, I don't have to worry about the smell of the cake at least. That was a relief!

          Now, for the taste. I got some bits and flakes to taste as I levelled the base of the cake with my serrated knife. Wow! not at all carroty! I resisted the temptation to dig in as I was planing to serve it whole, without disturbing the shape. Didn't have time for frosting. So decided on sprinkles of icing sugar. Garnished the top with carrot slices passed through my design slicer and took it to the tea table and the rest is history.. :)

Carrot Cake Recipe

Things you need:

(To make a small cake enough for 5 to 6 persons)

1 cup all purpose flour
1 1/4 cups(120g) grated carrots
2 large eggs
3/4 cup (150g) powdered sugar
1/2 cup (120ml) veg.oil/canola oil
1/2 tsp baking powder
1/4 tsp baking soda
1/2 tsp ground cinnamon
1/2 tsp vanilla essence
1/4 tsp salt

Method:

  1. Preheat oven to 180 degreeC (350 degree F) and place rack in center of the oven. Butter a medium cake pan and line the bottom with parchment paper.
  2. Peel and finely grate the carrots. In a separate bowl, whisk together the flour, baking powder, baking soda, salt and ground cinnamon.
  3. In a bowl, beat the eggs until frothy (about 1 minute). Gradually add the sugar and beat until the batter is thick and light coloured (abt 3-4 min). Add the oil in a steady stream and then beat in the vanilla extract. Now fold in the flour mixture and grated carrots with a rubber spatula until just combined.
  4. Transfer the batter to the lined baking pan and bake for 45 minutes to 1 hr at 180 degree C.
  5. Remove from oven when done or when a skewer inserted into the center come out with out crumps and let cool on a wire rack. After about 5 to 10 minutes, invert the cake carefully onto the wire wrack and cool completely.
  6. Serve sliced with sprinkles of icing sugar and carrot slices. Enjoy!

Jan 4, 2012

Vanilla Cupcake


              The weather is not lately as much torturing. The grueling cold has subsided a bit and it is more or less tolerable. So the kids enjoyed the outing for our weekend purchase like never before. The younger one was cooing and bubbling in his pram and the elder one was a packet full of energy. For him our purchase outing to our favorite supermarket is more enjoyable than going to the park. He loves the car trolley in the super market. For him it’s not just a shopping hike but a ride across the whole supermarket in his trolley car, crisscrossing across the array of goods and goodies.


            So it was not a wonder the boys were still up and chatty when we reached home late at night while Mr. KB was literally sleeping on his feet. On reaching home my elder sons first demand was, “ I want cup cake n I wanna have it right now” Phew! He is three now and I was a fool to think the ‘terrible two’ stage is over.. but nay, the tantrums has only begun. When he says,“I WANT IT ”, I guess it’s an order. It took too much persuasions and promises to make him understand that it is already late for bed and will make him cup cakes the first thing in the morning. And the boys were finally asleep at twelve O’ clock. Ah! I only remember my head touching the pillow and I was fast asleep. So to keep the promise I baked these cup cakes the very next day.


Vanilla Cupcake Recipe

Things you need:

100g  unsalted butter, at room temperature
2/3 cup granulated white sugar
3 large eggs
1 tsp vanilla extract
zest of 1 large lemon
1 1/2 cups (195g) all purpose flour
1 tsp baking powder
1/4 tsp salt
1/4 cup milk (60ml)
For the frosting:
Dream whip powder -  50g
Cold milk                 -  125 ml


Method:
  • Preheat the oven to 350 degree F (177 degree C) and line 12 muffin cups with paper liners
  • Separate the eggs into yolks and whites and keep aside.
  • In a separate bowl, sift together the flour, baking powder and salt. Sift atleast three times to aerate it.
  • With an electric whisk, beat the butter and half of the sugar until light and fluffy. Add the egg yolks little by little and beat well. Beat in the vanilla extract and lemon zest
  • With the mixer on low speed alternately add the flour mixture and milk in three additions, begining and ending with flour. Scrape down the sides of the bowl as needed with a rubber spatula.
  • Now beat the egg whites in a separate bowl with the remaining sugar until white and peeks appear
  • Fold it gently into the cake mixture with a rubber spatula or metal spoon.
  • Fill the muffin cups with the batter upto 3/4th hieght. Bake for 18 to 20 minutes or until a tooth pick inserted at the centre comes out batter free.
Frosting:

Whip the powder and milk at high speed for 5 to 10 minutes untill stiff peaks appear. Fill it in an icing bag with star shaped nozzle. Squeese it over the cupcakes to form swirls or any shape you like. Refrigerate covered before serving. Enjoy!

Dec 8, 2011

Black Forest Cake


           This is one of my favourite cakes and one I have been planning to make for ages. I just couldn’t gather enough time to bake the cake and go with the long process of frosting, assembling and decoration. So it was procrastinated for days, weeks and months. Now that it is done, though with a few pitfalls, I feel so much rewarded. It was definitely a long process. Phew! Looking at the finished cake I feel as content as at seeing my younger son smile. He has just turned three months and has started smiling.. He lights the entire home with the mere curve of his mouth... :)

                The original recipe of the Black forest cake or Gateau evolved from Germany in the 1915. It was invented by Joseph Keller. Typically it consists of several layers of chocolate cake with whipped cream and cherries between each layer. These layers are topped with additional whipped cream, maraschino cherries and chocolate shavings. Traditionally the cake is saturated with Kirschwasser (cherry brandy). I needed an alcohol free version and did the sprinkling with the syrup of canned maraschino cherries and it tasted just fine. As the entire process is a bit time consuming, it is wiser to split the process between two days… say, bake the cake, do the filling and assembling the first day... make the chocolate shavings and go with the frosting and decoration the next day. Otherwise you are sure to get pissed off by the end of the day. I have been there and I must warn you it was quite tedious.


                      If you are planning to make a cake of four layers here is an option. Bake two cakes and cut them horizontally with a serrated knife or using a thread. Then assemble it one by one over the other. Or if you are making a cake of three layers bake a cake with the given recipe and bake another using half the quantity of ingredients. Now split the first cake as said earlier and assemble them one over the other followed by the other thinner cake. I must confess that I made only two layers to my cake as I was too lazy to bake two cakes ;) To make the frosting and filling double whipped cream is just fine.  For the chocolate shavings you can use any kind of chocolate according to your taste but it is better to use dark chocolate around 60 to 70 percent dark, to get the real dark color. Dark chocolate is bitter to taste but you hardly notice it as you are going to eat it with the whipped cream which is sweet.


This recipe is basically an eggless recipe which uses condenced milk and noo.. eggs! Now, doesn't that make it more desirable to gobble?

Black Forest Cake Recipe
 Things you need:

Sweetened condensed milk - 400g

Softened butter - 100g

All purpose flour - 175g (1 ¾ cup)

Coco powder - 25g (3 to 4 heaped tbsp)

Baking powder - 1tsp

Soda bicarbonate - 1/2  tsp

Vanilla essence - 1 tsp

Aerated soda - 1 cup (150 ml)

For soaking and filling:

Cherry syrup - 20 ml

Whipped cream - 200g

Glazed cherries - 50g

For icing:

Maraschino cherries, drained - 100g

Whipped cream - 200g

Black chocolate (60 to 70 percent) -50 g

Method:


  • Preheat the oven to 180 C.
  •  Grease an 8 inch diameter cake tin with butter. Dust with flour and keep aside.
  • Sieve together the flour, coco powder, baking powder and baking soda into a bowl and keep aside.It is better to seive the flour at least three times. This is to aerate the flour to help form a light spongy cake.
  • To prepare the cake batter, add sweetened condensed milk to a bowl containing softened butter. Beat the two together thoroughly. Add vanilla essence to the mixture.
  • Add 2 to 3 tablespoons of flour mixture while beating continuously in low speed. Add some of the aerated soda while beating. Keep adding the flour mixture and aerated soda alternately to get a batter of smooth consistency. Do not over beat.Over beating results in a heavy cake rather than a soft and fluffy sponge.
  • Once the batter is ready, pour it into the prepared baking tin immediately. Bake it in the pre heated oven at 180 C for 35 to 40 min or till the cake is done. Remove the cake from the oven and loosen the cake sides using a knife. Keep for 5 minutes and turn the cake upside down on a wire wrack. Allow the cake to cool down.
  • Now cut the cake horizontally into two halves with a serrated knife or thread. Drain the cherries’ syrup into a bowl and brush the cake halves with the syrup. Take care not to over soak the cake or it will become soggy.
  • Whip the cream into the desired consistency or until it forms peeks.
  • Make the chocolate shavings by sliding the side of the chocolate bar on a vegetable slicer or vegetable peeler or with a knife. Make sure the chocolate is at room temperature to do this. Take care not to touch the chocolate shavings with your hands as it would melt. You can make the chocolate shavings before hand and store it in the refrigerator.
  • Place the whipped cream over one of the cake halves and top it with sliced cherries. Place the other cake half on top of it to sandwich the cream and cherries. Top with whipped cream. Cover the sides of the cake with the cream. Then sprinkle the chocolate shavings over the sides using a spoon. Then sprinkle it on top of the cake. Transfer the remaining whipped cream into an icing bag and pipe it onto the edges of the cake through a star nozzle to form rosettes. Decorate the cherries on top of the rosettes. Refrigerate covered for at least two hours. Serve after chilling.
  • The cake tastes best if you eat it after keeping for two days for the cake to absorb the cherry flavour.

Jan 11, 2011

Cranberry Muffins

         I always have had a heart for red colour, when it comes to food.. That must be the reason why, when you go vegetable shopping at the stores or super markets, you feel like an invisible hand pushes you towards the beautiful array of strawberries , tomatoes on the wine.. and the like... and you cannot wrench your hand away when it stretches unknowingly towards the red peppers. The result is.. you end up buying a lot of vegetables and fruits which where not in your 'urgently needed' list when you got into the store the first time. So when I saw these cranberries winking at me from inside the packet pulling me to it as if with ropes, I just had no power to resist and fell in the trap again.. SO LIKE ME! :(


       Back home in my kitchen, I was wondering what I was going to do with these cranberries, which even my son declined to eat due to their tartness. First I thought I would pickle them.. then I got a better idea. Why not incorporate it in a muffin? My son loves anything cupcaky and he is sure not going to mind cranberries in them. So I made these cranberry muffins and was glad I did. My son loved the interesting involvement of cranberries in his muffins and finished two of it immediately after it was taken out from the oven.

     The addition of orange zest gave it a flavourful twist which was hailed with zeal by both father and son. But I had a problem with the amount of batter to be poured in each paper cups. I made the first batch, filling quarter of the cups with the mixture and the result was muffins which didn't rise to the top. It rose only up to three fourth of the cups. So I made the next batch filling up to three fourth, and then it was perfect. A nice muffin with splashes of scarlet tartness from the cranberries. I must say, I too fell in love with their looks and taste. Coming to the recipe..


Things you need:

1/2 cup butter, softened
1 cup sugar
2 cups white flour
A pinch of salt
1 egg, well beaten
1 tsp baking powder
1/2 tsp baking soda
1/4 cup orange juice
3 tbsp grated orange peel
1 cup cranberries, coarsely chopped

Procedure:


1) Preheat the oven to 350 degree F. Line a medium muffin pan of 12 numbers with paper cups.

2) Sift together  flour,baking powder, baking soda and salt and keep aside.

3) Beat butter and sugar until soft and fluffy. Add orange zest and orange juice and beat until blended.

4) Beat the egg and slowly fold in to the mixture little at a time, adding a little of the flour mixture with last of the egg.

5) Now fold in the flour mixture gently. Very lightly stir in the cranberries.

6) Fill the batter up to 3/4th of the paper cups in the tray and bake for about 20 minutes until the surface is slightly brown and a skewer inserted in the middle comes out clean.

7) Transfer the muffins to a wire wrack to cool. Enjoy!


And Aipi of US Masala has shared this lovely award for participating in the Veggie/Fruit a month event. Do visit her blog.. She has a wonderful space with nice recipes. Thank you Aipi for the award!


Dec 31, 2010

Fruit Cake / Plum Cake

          There has been a lot of buzz in all cooking blogs for the last 2 weeks and everybody it seemed were busy cooking up their own beautiful fruit cakes. I don't know why I became so late in posting my own... old habits I guess ;) I have always been late to college and never been to a party in time. Doesn't that gives me a VIP stand? Well, I would like to think about it that way ;) But don't think I have never tried to be punctual. Yes, I have tried and tried only to discover that unpunctuality is in my blood, it runs through my veins... Every time it seems the time runs faster than it is supposed to... never waiting for my errands to conclude :(


          Everyday when  you wake up, it seems you have a long day waiting for you... You make breakfast, send your hubby off to office, play around with your kid, have some elevenses, do some cleaning chores, and suddenly you find you are in the midst of the day... and you rush to the kitchen, throw up a very quick lunch, eat it and feed it to your little one, do some cooking experiments, browse a while in the web, becomes a little chatty with your friend at phone and suddenly the calling bell rings and hubby is home. Oh God! it's already evening...  Then you serve your hubby food, talk to him for some time, make the dinner, have your Salah (Prayer) and then you find the day is gone... It is already night and you feel at a loss. There must be at least somebody out there who feels the same way as I do... Sure the time is running a marathon...


              So back to my fruit cake story... I just wanted to have a perfect fruit cake and already tried many variations... The target I had in mind tasted very much like the nostalgic 'plum cake' we used to have at festive seasons in India. I was so crazy about it and nothing less than that would do... I still do not know why it was called a 'plum cake'. I don't think they added any plums in it. There was a time when I had thought it was a 'plump cake' because it sure looked round and kinda plump. When my fruit cakes turned out nothing nearer to this cute cake, I resorted to another recipe and had the fruits sunk to the bottom... and another and after a lot of empirical researches I made it, at last! A fruit cake which was almost a perfect 'plum cake'! I made some changes to Chef Alison May's recipe... In fact made it a bit simple. Her recipe didn't use baking powder but more eggs and had to bake it for three hours. I am not a patient person to wait that long for my cake to get cooked, so I reduced the eggs and added baking powder instead. I reduced the fruit volume too because i found the contend in the original recipe so overwhelming. If you want a fruit cake which is fruity on every bite, then you may add more dry fruits say about 800 gram. Here I'm... a little proud of my accomplishment. I got a wonderful, light and moist fruit cake in just one hour!

                                      So it has been quite an eventful year...This would be my last post of the year. Am so happy that I could post this cake before new year :) Good bye 2010.. Welcome 2011!


The recipe goes like this...

Ingredients:
   
220 g plain flour
A pinch of salt
1/2 tsp mixed spice
 ( I used garam masala containing cinnamon, cloves, cardomom,star anice, nutmeg and maise)
1/2 tsp ground cinnamon
200 g butter
2 tbsp black treacle ( you can also use caramelized sugar syrup)
1 tbsp marmalade (I have already posted the recipe if you want it home made)
1/4 tsp vanilla essence
2 medium eggs, lightly beaten
1 tsp baking powder
400 g mixed dried fruit ( i used just black raisins, white raisins and tutti frutti )
50 g chopped mixed peel
100 g glace cherries, chopped
100 g blanched almonds, chopped
150 ml orange juice
200 g brown sugar

Method:

  1.  Soak 400g mixed dry fruit, 50g chopped mixed peel and 100g glace cherries in 150ml orange juice overnight.
  2. The next day, heat your oven to 330 degree F or gas mark 3. Grease a 20cm/8 inch round or an 18cm/7 inch square cake tin and line the bottom and sides with parchment paper.
  3. Sieve 220g plain flour, a pinch of salt, 1/2 teaspoon mixed spice 1/2 teaspoon cinnamon and 1 teaspoon baking powder in to a bowl.
  4. Cream 200g butter and 200g brown sugar in a large mixing bowl and mix in 2 table spoon of black treacle, 1 table spoon of marmalade  and 1/4 teaspoon vanilla essence until light and fluffy.
  5. Beat two eggs and fold them a little at a time inti the mixture adding a tablespoon of the flour mixture with the last of the eggs
  6. Fold in the remaining flour mixture until well mixed. Then mix in the soaked fruit mixture with 100g chopped almonds.
  7. Turn the mixture into the prepared tin and bake in the oven for 1 hour and then test with a skewer. Bake until the skewer comes out clean.
  8. Remove from oven and leave to cool in the tin for 15 minutes. Turn out on to a wire rack and leave to cool.
  9. Cut an serve after a few days. The more the cake sits, the more it imbibes the fruit flavour and will be more yummy. So you must be patient to wait at least a day before you cut and serve the cake.

Nov 15, 2010

Coconut Cake with coconut and cream frosting

                      There must be a stage in every baker's life when he finds out he can do something which he had thought to be impracticable in the past. And after you do it, you gets shifted to the upper class from where you would be able to look down to the past.. to the stage when you had feared to try that 'something', thinking it has been meant for the experts, and smile in silent amusement when others admire you for being an expert .. for being a 'knower' amidst all other 'unknowers'. And your heart winks at you joining in your secret and asks you, "After all it was not a herculean task.. It was quite easy, ain't it?"

                     Do I sound like I am blabbering? Well, what I was gonna tell you is .. I was also in the ignorant people's category on how to make an iced cake or how to prepare icing for a cake. When I used to gawk in awe at the iced cakes or pastry cakes in the shops, I had always thought it was beyond me and can only be done by very professional bakers with much sophisticated utensils and had never dared to experiment. I don't know what evoked the dare devil in me and just kept on insisting "why don't you try.. what if you succeed?" and I got the bit between my teeth.. And guess what? I couldn't contain my mirth when it turned out, not too bad and hubby declared it bitchin'..


                  It was only coincidental that I tried the icing on a Coconut cake. I had been planning to make one for some time and what actually happened was it got caught in between my icing adventure. That was how it turned out to be an  iced coconut cake. I was so engrossed in my icing experiment that I forgot to take pictures, silly me.. :) Only after the cake was done, did I remember capturing it in the lens and so.. for the time being you have to do with the finished photos. Later on I shall give you a detailed picture description of icing on my next venture. Did I tell you I sprinkled some desiccated coconut all over the icing so that it actually became a coconut icing..? And I inserted some chocolate chips too as a decoration. You could leave it as such or do some decoration. By the way coconut cake is more yummy than any other cakes..every bit of it crunchy with coconut. Me being a coconut lover should have known that. And the cake is particularly soft n moist too.Coming to the recipe..

Things you need:

For cake
2 cups self raising flour/ white flour
2 tsp baking powder
1/4 tsp salt
1 cup butter at room temperature
1 cup powdered sugar
4 egg yolks, well beaten
1 cup milk
1 tsp vanilla extract
1 cup shredded coconut
4 egg whites, well beaten

For frosting
2 egg whites
1 1/2 cups sugar
1/8 tsp salt
1/3 cup water
2 tsp light corn syrup
1 tsp vanilla extract
1/2 cup dessicated coconut( to sprinkle over frosting)
Chocolate chips (optional)


Preparation:
           
Cake:
           Measure the sifted flour into a bowl. Add baking powder and salt. Sift these ingredients three times. In a mixing bowl cream butter thoroughly; add sugar gradually. Continue creaming until light and fluffy. Add the beaten egg yolks and beat well. Add flour mixture , alternately with the milk, beating well after each addition.Stir in coconut and vanilla. Fold in egg whites gently. Bake in greased 8 inch pans at 350 degree F for about 30 minutes or until a wooden pick or cake tester inserted in the center comes out clean.Allow to cool on a wire rack.Makes two 8 inch layers.

Making the frosting:
          Combine all ingredients except  vanilla in the top of a double boiler over boiling water. Beat with electric whisk for about 7 minutes or until mixture will stand in stiff peaks. Beat in one teaspoon vanilla extract.

Frosting the cake:
          Spread the frosting evenly all over the sides and top of the cake with a small spatula. Sprinkle dessicated coconut all over the frosting. Press with your fingers on to the sides. Insert chocolate chips for decoration.  
    

Oct 24, 2010

Zebra Cake


   Home made cakes always had been alluring for me though I had had not much of it in my childhood. May be because I was born in a land where baking cakes at home was not that popular. People turned towards shops which sold cakes rather than bake them at home. And rarely did the homes have a fellow called 'oven' where you could bake a cake like the Europeans did. Still there were traditional ovens where cakes were made in a deep pan with firewood at the bottom of pan and coconut husk embers on top. Traditional cakes like the 'Kalthappam' used to be prepared in it.

          Later when time went by, slowly the cooking cultures, thought to be immiscible, began to marry... and people started baking English cakes in the traditional ovens... Later electric oven came, a thing which had a weired look like a UFO and we children were warned not to approach it while in switched on condition. Thank God, it was not a hulk like the old computers or it would have scared our vits out.. Still, when the aroma of the cake being baked in it hit our nostrils, we used to get an urge to go and examine what's going on .. but the 'danger' 'inapproachable' orders held us back on second thoughts. I don't have an idea, where the 'UFO' is now, but it still imparts a faint and distinctive flavour to my baking thoughts... a flavour which leans more towards a nostalgia.

         Those cakes were not much like those bought from the shops but yet we children loved it nevertheless and took it to our play hub where we would act at being some child detectives eating the home made cake in a secret place like the 'secret seven'.

         I  have a feeling that if I where born in a western country I would have been the 'cake lady of the neighbourhood' because the love for baking is in my blood... though I didn't have much chances earlier. That was why I started experimenting with those recipes, as soon as I could keep a hand on the oven I call my own.


           While looking for cake recipes, the looks of the cakes were as seducive as their ambeance for me. So, beautiful cakes had a way  with me always. When I say, I collected this recipes of the Zebra cake after it caught me off guard by its enticing looks, it is not an over statement. This cake is a real stunner in looks. But don't think the looks deceived me ... It had an inner beauty too... was as yummy as it looked... I got it originally from Farida Azerbaijani's blog... By the way it's an awesome blog! I came across it when I was simply blog hopping.. If you are interested, have a look at it. But I made slight changes in the recipe to suit my taste. Here is the recipe...

          (Well,  this cake was specially made for the 'official' launching of Kitchenboffin in my hubby's office. His buddies have been bugging him to bring something for them, ever since they saw my recipes on the blog :) )


     Zebra Cake

Things you need:
2 cups plain flour
1 tbsp baking powder
3 tbsp cocoa powder
4 large eggs at room temperature
1 1/4 cup castor sugar
1 cup vegetable oil ( canola or corn oil or sunflower oil)
2 tsp vanilla essence
1 cup milk at room temperature
1 pinch salt


Method:
  • Grease and line a 9 inch deep round cake pan. Preheat the oven to 160 degree C, ten minutes before baking.
  • Combine sugar and eggs and beat with a hand whisk or electric whisk until it becomes thick and fluffy, and pale yellow in colour.
  • Add in milk and oil and beat for 30 seconds until thoroughly combined. Add in vanilla essence and beat again.
  • In a separate bowl, combine flour, salt and baking powder  and mix well.
  • Add this flour mixture to the wet mixture and beat just until combined and no dry flour is visible. Take care to add the flour little by little to avoid lumps being formed.
  • Divide the batter into half . In one half add sifted cocoa powder and mix well. Leave the other half plain.
  • Now pour 3 tbsp of plain flour batter in the center of the pan. When it starts spreading out, pour 3 tbsp of cocoa batter in its center. Pour the two batters alternately until all is used up.
  • Place the pan in the center of the oven and bake till done. Examine the cake by inserting a bamboo skewer in the center. If it comes out clean, it's done.For me it took almost 45 minutes. Take care not to open the door of the oven for the first 20 minutes or the cake will not rise properly.
  • Take it out and allow to cool on a wire rack. Mean while detach the sides of the cake from the baking tray with a knife. Transfer it to the serving plate. Cut and serve.


LinkWithin

Related Posts Plugin for WordPress, Blogger...