Showing posts with label Bakes. Show all posts

Feb 9, 2015

Strawberry Mousse Cake


     I was tempted to make this cake after I saw it in one of my buddy blogger's blog, Full Scoops. The procedures proved to be easy and the cake looked too beautiful. It was loaded with strawberry flavour and my kids quite loved it. I used a vanilla sponge cake as base instead of chocolate cake, but made the strawberry mousse from fresh ripe strawberries and the cake became history in no time :)


Strawberry Mousse Cake Recipe

Ingredients
  • Cake - one 9" vanilla cake
  • Heavy Whipping Cream - 1.5 cups
  • Vanilla extract - 1 tsp
  • Strawberry puree - 1.5 cups
  • Granulated sugar - 2 tbsp (or to taste)
  • Icing Sugar - 1 tbsp (for the whipped cream)
  • Lemon juice - 1 tsp
  • Gelatin - 3 tsp
  • Cold Water - 3 tbsp
  • Strawberries - to decorate (optional)
Method:

Prepare the vanilla cake in a 9" spring form pan. I made it using the same recipe of vanilla cup cake. but halved the ingredients and poured the batter in a 9" pan and baked for 1/2 an hour. When the cake was done, let it cool in the pan itself.

For the mousse


1. Place  1.5 cups of heavy whipping cream in a large bowl. Leave the bowl (with the cream) and beaters in the fridge and freezer respectively.


2. Add 3 tsp gelatin to 3 tbsp water and let it bloom for 5 minutes. Then heat the gelatin in a microwave or saucepan for 30 seconds. Set this aside to cool completely.

3. You will need about 30-35 strawberries. Roughly chop the berries add the strawberries to the blender or food processor and puree without adding water.

4. Transfer the puree to a saucepan and add 2 tbsp of sugar and 1 tsp lemon juice and stir until the sugar is dissolved. Add the cooled jelatin to it and stir the puree for 3-5 minutes until it's slightly thickened.

5. While the puree cools prepare the cream. Make sure the bowl, beaters and the cream is chilled.

5. Add the vanilla extract and 1 tbsp sugar to the cream and whip for about 7-8 minutes until stiff peaks are formed. Do not overbeat.

6. As you beat the cream, about 5 minutes into beating, you will start seeing beater marks .At this stage add the cooled strawberry puree with gelatin and fold gently. Set this aside

7. Place parchment paper around the spring form pan over the sponge cake to line the sides of the pan. Pour the cooled strawberry cream into the pan over the cake.

8. Cover the cake pan and let it set in the refrigerator for a minimum of 4 hours.


9. Once the mousse sets, remove the ring of the spring form pan gently and top with some strawberries.

10. Cut and serve the cake in individual serving plates. Enjoy!!

Jan 12, 2015

Moist Chocolate Mug Cake


               Easy recipes  have their own beauty. They are more so, for super busy moms like me. Believe it or not, this recipe was so easy that I hadn't expected it to turn out good, when I first saw it in this gorgeous blog. I had never guessed there was an easy way to make a chocolate cake; without all those whipping, beating and folding processes. And I was not so optimistic as to the outcome of a cake in the microwave, as the one time I had attempted it before had given me something like a sweet spongy dough.

            But  Julie's  words as well as her pictures tempted me enough to try it out. After all it was just a matter of 5 minutes. Amazing enough, incredible enough, so unbelievable, it turned out to be a moist soft chocolate cake, which the boys fought over. I have made it again 3 or 4 times, since the first attempt. It has become one of my latest time saver desserts. Try this out for your kids and you wouldn't be disappointed.

Moist Chocolate Mug Cake
(Recipe adapted from Table for two)

1/4 cup all purpose flour
2 tbsp unsweetened cocoa powder
1/4 tsp baking powder
3 tbsp powdered sugar
a pinch of salt
1/4 cup milk
2 tbsp veg.oil
1 tbsp Nutella

Method:

  1. In a medium bowl, whisk together all the dry ingredients.
  2. Whisk in the milk and oil and mix well until well combined and no clumps are seen.
  3. Pour batter into a micro wave safe large coffee mug.
  4. Drop 1 tablespoon of  Nutella or any other chocolate spread in the middle of the batter. No need to push it down.
  5. Microwave mug cake for 1 minute on high.
  6. Remove from microwave and serve hot or cold. Enjoy!

May 25, 2014

Zucchini Cupcake

 
            It was one of the busiest weeks in my life. I was on a roller coaster ride of life where you literally forget to breath. After all life could never be so idle when you have three kids (Well, I mean four!! Grown up ones can  be more insisting) around. Juggling between cooking, sewing, blogging, reading and lot more kids stuff which you would probably not find in the dictionaries; is what recently life is like. I call myself lazy no more. You just don't have space for that word in my 60 miles/hr marathon life. Aaah!! I think you can of course hear me panting.. just halting a bit to take breath!!

            Still!! I am enjoying it on the go!! I seriously can't imagine life with a lower pace. I guess it's all part of the fun. I am just trying to enjoy an ice lolly on the ride... After all roller coaster rides are meant to be fun. And of course it is!! If you take it in the positive sense :)


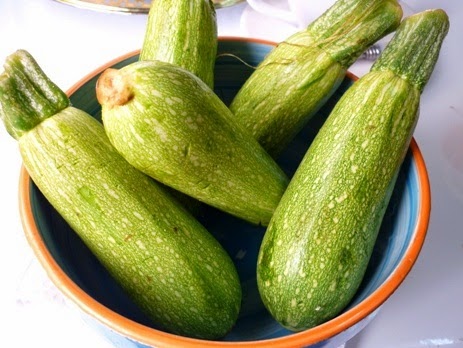
           So, I'm posting the recipe of Zucchini cupcake I had made a few months back. It is one of the latest additions to my kids menu,which helps me sneak in veggies to their veggie resistant tummies. Gosh! The boys never suspected, their enemies were hiding right under their noses; and the cakes were gone, before I even knew it. Try this for your kids, if yours are Yuck! Yuck! towards veggies too.. A sure shot to success; believe me;)


Here is the recipe...

Apr 9, 2014

Lemon Cake with Lemon Glaze


              Kids can be really fussy when they are hungry. And they decline to eat whatever we offer during such tantrums. They prefer something sweet and junk. Most of the time we cannot give in to their persistence and the situation need to be tackled with diplomacy. But there are times when you have to do some misgivings, if you really like to have a calm atmosphere in the home.

             Nowadays whenever my elder one gets such hunger pangs in the evenings, all he prefer is cakes,cup cakes and nothing else. He is so much fond of cakes; big or small, iced or not, that I find myself baking cakes every now n then. As it is much easier to bake and serve cup cakes that most of the time cup cakes is that which blooms in my oven. But they get finished off too quickly that you hardly get anything left to store for future use.

            In fact, the Zucchini cup cakes I baked last week got polished off pretty fast that I thought it would be wise to bake a large cake so that  the boys would have enough for three to four days. This time I tried a cake of very different flavour.. Lemon Cake! Tangy, sweet and impressive.. it was devoured by the whole family. I iced it with lemon glaze, which complimented well with the cakes flavour; though the son didn't much like it due to its tanginess. But he loved the cake nevertheless and ate it scraping off the glaze. The cake was a little tart on the first day, but the next day it tasted  perfect. The tanginess had thankfully subsided and the cake was soft and flavourful.

You would like to see the Recipe? Go ahead.

Mar 12, 2014

Strawberry Cake with Cream cheese frosting


            We had plenty of strawberries from the market and they were so ripe that they couldn't be stored for long. Apart from giving to the kids to munch, I had to do something about them, fast. It nagged me that it has been a long time since I made a real frosted cake. In fact I hadn't even used the turn table and offset spatula which Mr. KB gifted me last year. He had begun throwing comments into the air that there was no sign of any cake nor of his presents anywhere. And the elder boy was always complaining that I don't make him cakes as I used to be.. So I decided to give it a go as I couldn't tarnish my image with a few jibes of the males in the family; if I could help it. I was going to prove that after all it's just a piece of cake ;)


                 When I suggested strawberry cake, the son was more than happy. He loves frosted cakes like anything and he loves strawberries too. Often we get him frosted cakes from the nearby confectionery and when he is told that the cakes at the confectioneries are not good,he would reply, "Then you better make them at home because I'm gonna need them very often". So I knew I wouldn't be able to get way without baking cakes for them for long...


                Of course Mr.KB's presents were a great help. If you have the necessary stuff, frosting cake is a cake walk. I really enjoyed doing it this time unlike older times when I would start sweating over just the thought of frosting a real cake. I made a medium cake, cut it into three equal layers with a long serrated knife (which comes really handy while layering a cake) and frosted with cream cheese..


                   It's better not to mention the fights between the boys to lick the spatula in between frosting! Well, I must warn all mothers with little kids around, who plans to frost a cake. This is the most common technical difficulty you are going to encounter while frosting a cake!!
                The boys were somewhat pacified by the promise that the spatula would be given to one and the bowl to the other, to lick ;after I am done with frosting.
            And you are not actually human if you don't dip your finger in the bowl of cream cheese yourself and  put it in your mouth at least once while you frost the cake !! So you get the other technical difficulties!! Keep these in mind and you shall frost your cake with great zeal...Good luck ;)

Dec 17, 2013

Middle Eastern Cardamom Biscuit / Kleja


         Over the years, I have been attracted to many things in the middle east. When I first came here, I never dreamt of liking anything here. A heart tortured with homesickness, it always longed for the greenness of home and hated everything about this dusty desserty land. It was strange and uninteresting to me. I thought the dust storms and gruelling cold would make me sick and sometimes it did. But slowly, very slowly I began to get adapted to everything and surprised myself as I began to fall in love with the things here. I began to see life here with a new perspective. Right from the people's way of greeting to their enchanting cuisine.. everything shouted warmth.
 
        Over the years, I have watched the middle east people greet each other with as much warmth as I haven't seen any where else in the world. The way they hug each other and kiss each other generously on the cheeks was fascinating to me when I first watched them. Though I know that people in the middle east are known for their tempers, how they are able to hug each other in a graceful embrace and plant a number of kisses on each others cheeks, at the end of  the day is quiet interesting. Whatever it is, it takes a bit of forgiveness and love to embrace another person  with such warmth. And that is the first thing I fell in love with, here...'the people's way of greeting each other'


            The second thing I fell in love with is the middle eastern cuisine. Right from perfectly baked chicken to beautiful baklavas, everything middle eastern shouted warmth. And I have lost count of the number of baklavas I have chewed down my throat in the last six years.
            This is a biscuit from the middle east  I tried sometime back and is perfect for this cold weather with a hot steaming cup of tea. It is called Kleja in arabic and is locally available in supermarkets and confectioneries. But baking it at home gave it a bit more realistic essence and what more? real warmth. Try this for the  holiday baking ventures. It sure wouldn't let you down.


Kleja / Cardamom Biscuit  Recipe:
 
3 cups whole wheat flour
3/4 cup sugar
1/2 cup veg.oil
1/4 cup low fat milk
1 egg, beaten
1 tbsp baking powder
2 tsp ground cardamom
1/4 tsp salt
Egg+ 2 tbsp milk (for egg wash)
 
Method:
  • Combine sugar and milk in a small pan and stir over medium heat without boiling, until sugar dissolves. Set aside to cool.
  • Sift flour and other dry ingredients into a mixing bowl. Add oil into it and combine with a fork until crumbly.Then add egg and milk sugar mixture. Mix well with hands and form the dough into a ball. Let set for 10 to 15 minutes.
  • Preheat the oven to 160 degree C
  • Roll dough on a lightly floured surface. Cut it with biscuit cutters or lid of a bottle into 2 and 1/2 inch circles. Make cross lines on it using the back of a knife.
  • Line a baking sheet with parchment or baking paper and place them on it. Brush with egg wash and bake at 160 degree C for 15 to 20 minutes or until golden brown.
  • Let cool and store in an air tight container or serve with tea.
 

Sep 17, 2013

Cinnamon Roll


                   Hi everybody! Hope you all had a great time. I had gone to India for a month long visit, to celebrate Eid with  family and friends. As it was our first visit home after our daughter was born, everybody was waiting in expectation. We had our share of monsoon, homely foods, hilarious gatherings and shoppings The only drawback I found of the visit home was, it made my daughter a bit naughty. After the pamperings she got there, she refuses to lie quiet and insists on picking her up when ever she wanted. To my horror she can really stand fast on her demands (just being 5 months old) and often achieve them without much efforts. All she has to do is scream her head off!!

                 Back in India, our vacation was eventful with celebrations. Wether it be weddings or house warmings or baby showers,  sometimes it seems celebrations never ceases there.And hence time went away like lightning. Before I knew it, we were on our flight back, chewing on memories.As afore said, with a screaming infant on the 'Be ware' list, you cannot squeeze in much time for experimental cooking and the stuff. So nothing new has bloomed in my kitchen, since I had a bun in the oven. These cinnamon rolls were sitting in my draft for ages. So thought of  posting it now.


The Recipe
For the dough:
500g flour
7g dry yeast
60g melted butter
200ml milk
70g sugar
2 medium sized eggs
1 pinch salt
For the filling:
1 tbsp powdered cinnamon
200g brown sugar
80g butter kept at room temperature
For the egg wash:
1 egg
2 tbsp milk

Method:

Make the dough:
  •  Mix the yeast in a little warm milk and keep aside covered for 10 minutes to rise. Add flour, sugar, salt, eggs        ,milk, butter and risen yeast into the mixer.Mix the ingrediants on low for 5 minutes until shiny. Add about 2 tablespoon of flour more to the bowl and turn off the mixer. Scrape the dough from the hook.
  • Put a little flour inside the bowl and sprinkle some on the work table. Knead the dough briefly. Return the dough to the bowl. Cover it with a damp cloth and let rise for about 1 hour or until double in size.
Make the filling:
  • Place into a bowl, brown sugar, cinnamon and butter. Mix with a spoon until combined and set aside.
Preheat oven to 180degree C
Roll the dough:

  • Punch the air out. Sprinkle work space with flour and place the dough on it. Sprinkle the dough with flour and roll to 1/2 cm thickness.
Fill
  • Spread the filling on the dough.  Carefully roll the dough in.to a log and cut into slices of 3cm thickness. Place them on the lined baking tray, leaving enough space for the rolls to rise. Allow them to rise for 15 to 20 minutes.
Bake:
  • Take egg wash and  paint each roll individually with a brush. Put the tray into the oven and let bake for 12 to 15 minutes.
Remove from tray and let cool.


Jan 9, 2013

Chocolate Almond Biscotti

            The cold days (and even colder nights) are here. This year the chill is creeping in very slowly ( too slowly it seems). So my son still refuses to wear his sweater while going to school and comes back cold and hungry...
            These days, the kitchen pantry need to be stocked with all kinds of eatables ranging from cookies to corn flakes. As the hunger pangs are high in the winter season, the boys come to the kitchen in search of snacks, every now and then. If you don't have goodies stocked, then you are sure to get exhausted with their constant nagging to make something for them. So I decided to make something with a longer life span than muffins, so that I could store them for future use.


             I haven't made Biscotti , before; but have been planning to make one for sometime..They are twice baked biscuits originated in Italy and has an oblong shape and are usually baked with nuts like almonds or pistachios in it. Baking twice,makes them very dry and could be stored for long periods of time. As I have hardly any time for serious baking and cooking these days, I thought it perfect to make a big batch of biscotti and store it right away for the ever hungry boys :). The fact that it is practically a no-fat version of biscuits, made it all the more appealing to me because, after all am I not the person who polishes off the boys' left over food, every time?;) So if it's a low fat version, then the better for me..


            My elder son loves both chocolate and almonds. That's simply why I selected this simple recipe of  Chocolate Almond Biscotti. The product was a little bit dry, which was expected, but the combination of chocolate and almonds was fantastic, which gave the biscotti, a bity, nutty texture.

          At last I have a big jar of biscotti waiting to be attacked by two hungry little boys...:)

The Recipe:
(makes about 20 to 24 biscotti)
(Adapted from David Lebovitz' ROOM FOR DESSERT)


Things you need:
1 3/4 cups all purpose flour
2/3 cup (135g) granulated sugar
2 large eggs
2/3 cup (110g) semi- sweet or bitter sweet chocolate chips
2/3 cup (110g) blanched whole almonds
1 tsp baking pdr
1 tsp pure vanilla extract
1/4 tsp salt

Method:


  • Preheat oven to 180 degree C (350 degree F). Toast almonds for 8 to 10 minutes or until, lightly browned and fragrant. Let it cool and then coarsely chop and set aside.
  • Line a baking sheet with parchment paper
  • In a bowl, beat the sugar and eggs on high speed until thick, pale and fluffy.(about 5 min). Beat in the vanilla extract. In a separate bowl, whisk together flour, baking powder and salt. Add the egg mixture and beat until combined. Fold in chopped almonds and chocolate chips.
  • Transfer the dough to a well floured counter and roll into a log shape, about 30cm long and 3 1/2 inches wide. Place on the baking sheet and bake for about 25 minutes or until firm to touch.Remove from oven and let cool for 10 minutes on a wire wrack.
  • Reduce oven temp to 165 degree C (325 degree F). Transfer the log to a cutting board and cut into about 1/2 inch slices, on the diagonal. Place the biscotti, cut side down, on the baking sheet. Bake for about 8 to 10 minutes, turn slices over and bake for another 8 to 10 min or until golden brown.
  • Remove from oven and let cool. Store in an air tight container.

Jul 4, 2012

100th post and a decadent (Coco powder) Brownie


            Yes, friends! I have reached the milestone at last. I have climbed to the toddler phase of culinary adventures, leaving behind the infant stage. The blog is also turning two. Many of you would think, 'It's not a big deal' as most of you would have attained the milestone with in a year of your blogging and I must confess that I was a bit slow there. But still; looking back, I feel a sense of triumph, for never in my life had I dreamed of reaching 100 posts in my blog when I started it. I thank almighty Allah for making it possible for me..


            A little history...

             I had actually started cooking seriously after marriage and had to confront a lot of hurdles, as I was a real zero as far as culinary knowledge and instincts were concerned. Before wedding, my cooking experiences were limited to making instant noodles now and then, making a few snacks which I loved to have for tea, cutting vegetables to help my mom and of course toasting breads for breakfast. So it is not an overstatement, if I say that I found the responsibilities(of cooking)  huge enough to suffocate me and dreaded the outcome of my 'admirable cooking skills' in my inlaws' home. 

            My poor mother in law would have had quiet a number of heart attacks after I squeezed myself into her cooking space with my annoying kitchenastics. Luck was on her part as I could not stay with her long enough to display all my 'cooking tactics'.  I was plucked out of her cozy kitchen into the wilderness of a foreign kitchen as I settled abroad with Mr.KB with the whole mess of a kitchen all to myself. Oh! boy, How scary it was to start cooking from scratch with no body to assist you and nobody to turn to help! You must be thinking why Mr.KB could have helped, right? Well, if you knew him well, a thought like that would never pass your mind. If there was some one who was more ignorant than me in cooking, it was him :)

            And I had started cooking with my mom's and mom in law's recipes scribbled on bits of papers and it was followed by a lot of ISD calls to mom asking for the merest bit of explanations. Later I began reading recipe blogs and used to gawk at the pictures in them with much awe and admiration. It was those recipe sites and blogs which gave me an ardent zeal to experiment anything under the sun. That was when Mr.KB suggested, why not create a site of your own so that you can actually do something better than gawk at the pictures of food which other people prepared. It was his insisting compulsions which made me give in. If it was not for him, I would never have  started this blog, and would have went on with my lazy life as ever.

          Gratitude....

          Of course I have learned a lot on my way... from cooking tips to basic food photography. Even now I use a point and shoot camera to shoot my foods with nothing particular to boast about. I love food photography and I dream of having a DSLR  of my own sometime, but don't know when I would be able to have it. Till then you will have to bare with my plain looking pictures.. Any way, I thank you my readers, for all your loving encouragements  without which, I would have reached nowhere. And much gratitude goes to my blogging pals, who have created a lot of positive attitudes towards each other making the blogosphere alive with events, awards and give aways. All of you who had taken time to read my blogs and given valuable comments, I fondly remember you as the lights which lead me on every day of my blogging..

       The sweet...


         Celebration time always asks for sweets and there's nothing more addictive than this incredibly fudgy, moist and chocolaty, coco powder brownie. Caramelised nuts on top makes it even more worthy. The health nut in you may perhaps resist it seeing the loads of calories it may add to your diet. But it is one of those delicious goodies which you can have on the rare occasions of celebrations, forgetting all about diet and disregarding your figure.

Fudgy Coco powder Brownie with caramelised nuts
10 tablespoons (1 1/4 sticks) unsalted butter
1 1/4 cups sugar
3/4 cup plus 2 tablespoons unsweetened cocoa powder (natural or Dutch-process)
1/4 teaspoon salt
1/2 teaspoon pure vanilla extract
2 cold large eggs
1/2 cup all-purpose flour
1/2 cup chopped caramelised walnuts/almonds

Method:


  • Position a rack in the lower third of the oven and preheat the oven to 325degreeF or 160 degree C. Line the bottom and sides of the baking pan with parchment paper or foil, leaving an overhanging on two opposite sides.
  • Combine the butter, sugar, cocoa, and salt in a medium heatproof bowl and set the bowl in a wide skillet of barely simmering water. Stir from time to time until the butter is melted and the mixture is smooth and hot enough that you want to remove your finger fairly quickly after dipping it in to test. Remove the bowl from the skillet and set aside briefly until the mixture is only warm, not hot.
  • Stir in the vanilla with a wooden spoon. Add the eggs one at a time, stirring vigorously after each one. When the batter looks thick, shiny, and well blended, add the flour and stir until you cannot see it any longer, then beat vigorously for 40 strokes with the wooden spoon or a rubber spatula. Spread evenly in the lined pan and sprinkle the top with caramelised nuts.
  • Bake until a toothpick plunged into the center emerges slightly moist with batter, 20 to 25 minutes. Let cool completely on a rack.
  • Lift up the ends of the parchment or foil liner, and transfer the brownies to a cutting board. Allow it to completely cool.Cut into 16 or 25 squares and serve.
Recipe courtesy: Epicurious.com

Jun 20, 2012

Moist Banana Cake


          Climate in the G.C.C has become all the more horrible. The sun is sizzling at degrees above 50 and you could literally fry an egg on the foot path. Taking kids to the park or going for a walk is out of the question. To top it all, there is the lingering episodes of summer colds and fever spiced up with sore throat and tonsillitis. The boys were down with fever and it made dreams of cooling the air with the air conditioner shattered to vapours pieces. Now, where have I heard something like 'between sea and the serpent'? So it was impossible to cook up anything new, nor was I in the mood for experimenting after culinary fads.. The hot weather and temper together with the sickness made me wee bit lax and lethargic. So I thought of posting something I have had in the draft for a long time. Banana cake is something you can rely on when the time is a bit scarce.


         If there is anything which I used to make every weekend, it is the banana cake. There are two reasons. Firstly, it is very quick and easy to whip up the batter and secondly it always helps to use up the over ripe, pitiful looking bananas which dwell on the corner of the kitchen, declined to be eaten by even my banana lover son. So, almost always, the last one or two bananas of the week, ends up as a cake and finally in the tummy of whoever declined to eat those bananas (queer, aint it?). It is one of the cakes, which always came out good for me. The addition of vegetable oil instead of butter makes it all the more moist and soft. It is a bit different from the banana bread, I posted sometime back and uses cinnamon for flavouring instead of nutmeg. You can see that cinnamon and banana blend well for a delicious flavour. Sometimes it takes the simplest ingredients to make a most delicious blend of flavours and here is an example. If you like to have a nutty bite to the cake, feel free to throw in some walnuts or pecans. Here I have left it plain.. just a delicate whiff of banana and cinnamon. Simplicity wins....., I guess :)

Moist Banana Cake

Things you need:


(To make a medium cake enough for 8 to10 persons)

2 cups (260g)all purpose flour
4 large eggs
1 1/2 cups (300g) powdered sugar
1 cup (240ml) veg.oil/canola oil
2 ripe bananas, peeled and smashed
1 tsp baking powder
1/2 tsp baking soda
1 tbsp ground cinnamon
1/2 tsp vanilla essence
1/2 tsp salt

Method:

1.Preheat oven to 180 degreeC (350 degree F) and place rack in center of the oven. Butter a medium cake pan and line the bottom with parchment paper.

2.Peel and mash the bananas in a mortar or in the blender. In a separate bowl, whisk together the flour, baking powder, baking soda, salt and ground cinnamon.

3.In a bowl, beat the eggs until frothy (about 1 minute). Gradually add the sugar and beat until the batter is thick and light coloured (abt 3-4 min). Add the oil in a steady stream and then beat in the vanilla extract. Now fold in the flour mixture and mashed bananas with a rubber spatula until just combined.

4.Transfer the batter to the lined baking pan and bake for 45 minutes to 1 hr at 180 degree C.

5.Remove from oven when done or when a skewer inserted into the center come out with out crumps and let cool on a wire rack. After about 5 to 10 minutes, invert the cake carefully onto the wire wrack and cool completely.

6.Serve sliced with tea or coffee. Enjoy!

This cake goes to Favorite Cake Recipes event at Swathi's Zesty South Indian Kitchen.

May 25, 2012

Strawberry macarons


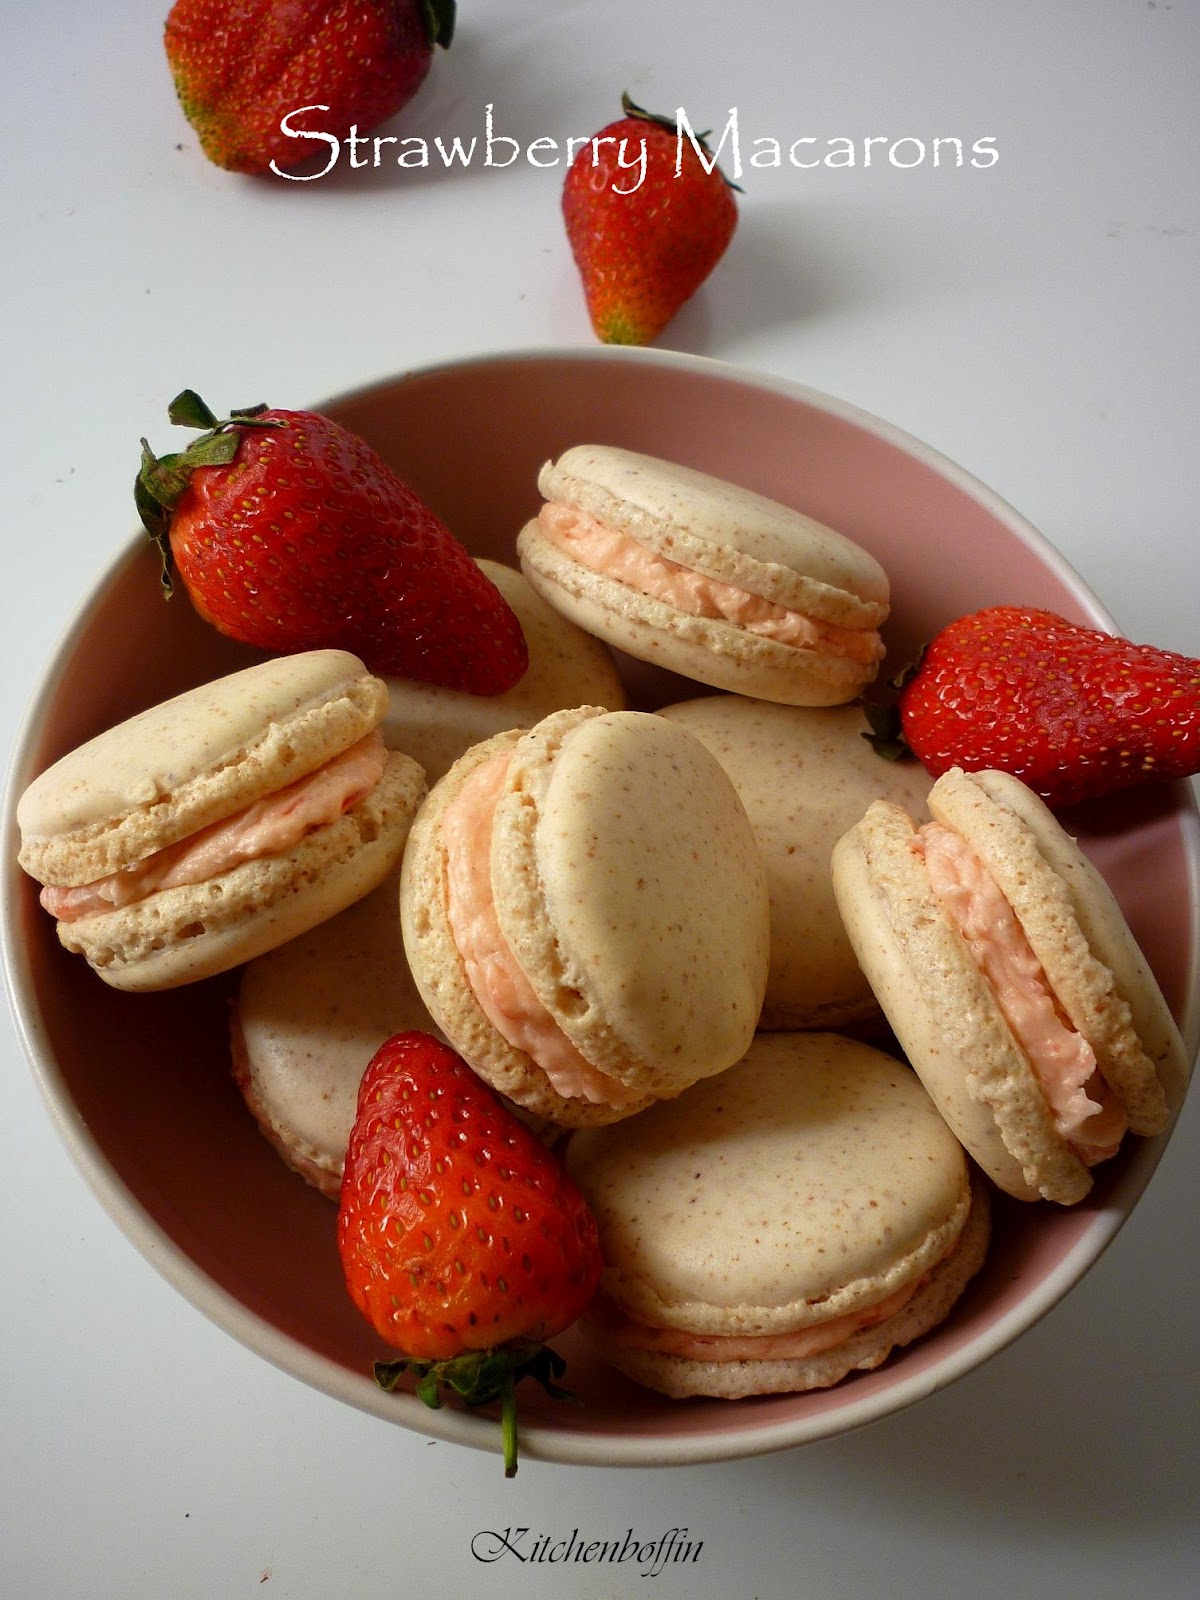
          It  has been a while since I made macarons. I have been planning to include strawberries in my macs ever since the strawberry season started but every time my strawberries got finished before I got a chance to incorporate it in a mac as my son loves nibbling them on as it is. This time, I managed to get the strawberry box hidden behind a bunch of lettuce in my fridge, which he hates, and started making the macarons when he was fast asleep.

           As a child, I was not much fond of strawberries. I always associated it with the multivitamin tonic, mom used to give us when we were small, which I hated. It had the strawberry flavour. So when ever, I got candies or ice creams with strawberry flavour, I used to reject it saying it has 'tonic flavour'. As I have never given any tonics to my kid with strawberry flavour, he still loves strawberries and anything made with them.


          I hadn't much time to blanch the almonds and all; so I powdered the almonds with the skin on. There was not much difference other than the specky shells which I find is adorable, which would otherwise have been plain white. Mashed a few strawberries in the mortar for the strawberry butter cream filling, but decided to leave the shells plain, not colouring or flavouring them. Too much flavour in macarons (according to me) is not good as I think it overpowers the real macaron flavour of almond and sugar.


Strawberry Macaron Recipe

Things you need:

For the Macaron shells:

65 g ground almonds
100 g icing sugar
50 g aged egg whites (about two egg whites)
25g granulated sugar
Pinch of salt

For the strawberry butter cream filling:
(yields 1 cup)

1/2 cup unsalted butter or margarine,at room temperature
Sifted confectioners sugar, to taste( about 1 cup)
1 to 2 tbsp milk
1/4 tsp pure vanilla extract
3 tbsp Strawberries, hulled and mashed


Method:
For the shells:
1. Firstly age the egg whites: Place egg whites in a clean bowl and cover lightly with a kitchen towel or tissue paper. It should not have any streaks of yolk in it. Keep it in your kitchen counter for 24 to 48 hours or up to 5 days in the fridge. Aging egg whites help to reduce its water content which is turn makes firmer shells for cookies.

2.Pulse the almond powder and icing sugar in the food processor or blender until fine and sift it into a large bowl to break lumps and aerate it. Discard any lumps or almond pieces. Keep it aside.
3.Whisk egg whites in a clean stainless steel bowl with no traces of fat in it, using an electric beater(medium speed) adding a pinch of salt.When the egg whites become foamy( like bubble bath) start adding granulated sugar slowly and beat on high until stiff glossy peaks.
4.Fold in the dry mixture to the meringue( beaten egg white) in two batches,quickly with a flexible spatula until well combined and no dry mixture is visible in the batter (it takes about 50 to 55 folds).At this stage your batter should be smooth, thick and shiny which slowly and ruggedly drips off your spatula as a ribbon when you lift it. Do not over mix once you have reached that thick batter stage.

5.Line your baking sheet with baking paper or parchment paper. Fit your piping bag with a round tip nozzle, clamp the bag with a cloth peg or clip just above the nozzle and scoop the batter into the piping bag keeping it in a tall glass to help with the filling. Now remove any air bubbles in the batter by squeezing it towards the nozzle by keeping the icing bag on a flat surface. Twist the ends and remove the cloth peg. Pipe out small rounds of about 2 and 1/2 cm diameter on to the baking paper leaving two inches in between them. Rap the baking sheet on a flat surface, a few times to flatten the batter and to remove any air bubbles, trapped in.


6.Let the batter sit to dry as long as it leaves no indentation once touched, lightly. DO NOT keep it too long to dry.This resting time vary from place to place depending on weather and humidity. It may take from 10 minutes to 2 hours.

7.Preheat the oven (conventional) to 160 degree C. While keeping the baking sheet, reduce the temperature to 140 degree C and keep the oven door slightly ajar with a wooden spoon while baking. In fan forced convection oven, preheat to 180 degreeC and then reduce to 160 degree while baking and bake the macarons for 15 to 20 minutes until completely done.

8.Take them out and let cool on a wire wrack along with baking paper for 15 to 20 minutes. Peel them out carefully with an offset spatula and sort them out with same size shells. Fill them with filling and keep in fridge to mature for a day or two for the flavours to blend. Unfilled shells can be frozen.


Note: To get a general idea about macaronage technique and points to note while baking macarons, read my post, Finding feet on French macarons posted a little while back..


For the filling:

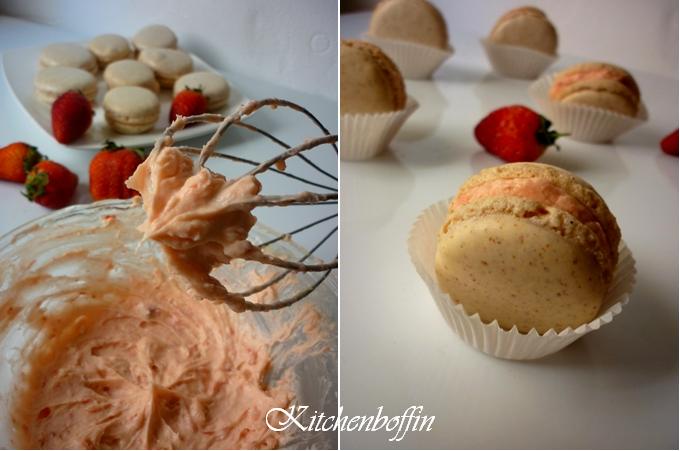
    In a bowl, beat the softened butter until creamy and pale. Gradually add confectioners sugar, little by little and beat well on medium speed. Scrape sides and bottom of the bowl. The cream will appear crumbly and dry now. Add milk and continue beating at medium speed until light and fluffy. Finally add the mashed strawberries and mix well. Use immediately or store in a sealed container in the refrigerator until ready to use. Re whip on low before using, if the butter cream is refrigerated.

May 6, 2012

Carrot Cake


                 I had made a small carrot cake last week  and  it got polished off pretty fast. So I am planning to make another one (this time bigger) so that I can take it to my friends' place too.
               Last week we had guests. Mr.KB had some of his friends coming over for tea and one of them, I was told, hates anything with chocolate. And we had done with a lot of fritters and fingerfoods that week. So Iwas not in a mood to make anything fried. Baking was the preferable option which looked out. Thought of making brownies. That was when the 'no chocolate' bell rang in my head. So what should I bake then? I had been planning to make carrot cake for a while and had a bunch of fresh and juicy carrots resting in peace in my refrigerator too. They were taken out from their undisturbed abode and transformed into carrot grates to make the subject of talk yummy.


           I was a little apprehensive as to how it may taste. A cake that tasted like a bunch of cooked carrots was definitely a No No. I even pictured Mr.KB's friend telling him with a grimace that he preferred chocolate to vegetable cakes. Had a mind to throw in some nuts, but decided otherwise later. Fingers crossed, I waited for the cake to rise and get done.. and my nose flared to pick even the slightest hint of that 'cooked vegetable smell' which may erupt from the oven. What reached my nostrils instead was cinnamon and something sweet. So, I don't have to worry about the smell of the cake at least. That was a relief!

          Now, for the taste. I got some bits and flakes to taste as I levelled the base of the cake with my serrated knife. Wow! not at all carroty! I resisted the temptation to dig in as I was planing to serve it whole, without disturbing the shape. Didn't have time for frosting. So decided on sprinkles of icing sugar. Garnished the top with carrot slices passed through my design slicer and took it to the tea table and the rest is history.. :)

Carrot Cake Recipe

Things you need:

(To make a small cake enough for 5 to 6 persons)

1 cup all purpose flour
1 1/4 cups(120g) grated carrots
2 large eggs
3/4 cup (150g) powdered sugar
1/2 cup (120ml) veg.oil/canola oil
1/2 tsp baking powder
1/4 tsp baking soda
1/2 tsp ground cinnamon
1/2 tsp vanilla essence
1/4 tsp salt

Method:

  1. Preheat oven to 180 degreeC (350 degree F) and place rack in center of the oven. Butter a medium cake pan and line the bottom with parchment paper.
  2. Peel and finely grate the carrots. In a separate bowl, whisk together the flour, baking powder, baking soda, salt and ground cinnamon.
  3. In a bowl, beat the eggs until frothy (about 1 minute). Gradually add the sugar and beat until the batter is thick and light coloured (abt 3-4 min). Add the oil in a steady stream and then beat in the vanilla extract. Now fold in the flour mixture and grated carrots with a rubber spatula until just combined.
  4. Transfer the batter to the lined baking pan and bake for 45 minutes to 1 hr at 180 degree C.
  5. Remove from oven when done or when a skewer inserted into the center come out with out crumps and let cool on a wire rack. After about 5 to 10 minutes, invert the cake carefully onto the wire wrack and cool completely.
  6. Serve sliced with sprinkles of icing sugar and carrot slices. Enjoy!

Apr 19, 2012

Sunshine Macarons inspired by Summer


Spring is in the air
Summer is here
Sunshine never seize to inspire
Play with colours
Red n yellow showers
Simply think it's again happy hours

         So Yes! It's that happy time of the year.. So poetic and picturesque. The broiling sunshine, the jaded green grasses, sparkling calm waters and chirping birds.. You would simply love to scribble poems and sit and enjoy the beautiful weather. Such a blissful occasion to let your imagination loose in everything from food to fair writing. The weather is so pleasant that it imparts a realistic essence of vigour in all actions... and I set out to make macarons again.

         I had lot of ideas. I haven't yet participated in the Mac Attack at MAC TWEETS, a blog started exclusively for Macaron enthusiasts to share their mac adventures by two talented bloggers, Deeba and Jamie. This time they have set the theme to 'dual colored macarons' and I was more than willing to take the challenge in my elated mood. Thinking of the coming summer and the vibrant sun, the two colours which came to my mind were orange and yellow. Yes! the colour of Sunshine.


          For the double colour effect I borrowed Kim of Macaron Fetish's method of putting different bags of batter into one piping bag and then squeeze to finish. For the shells I used the basic macaron recipe. For the flavour sake, lemon curd for the filling and dashes of 'sumac powder' on the top of the shells. Tangy and tempting, it tasted perfect for the season. If you are not a tangy love kinda person, the flavour may seem a little overpowering. In that case you can always go for jams and jellies and of course chocolate ganache.

            This time I baked all the batches in my fan forced convection oven and they came out perfect as the heating was even. I found that baking macarons is easier in it than in the conventional gas oven I have with heating element at the bottom. I have seen some blogs quoting that you cannot bake macarons in a fan forced convection oven which I find is ridiculous as I get better results in it. I have doubts on whether they have even baked their macarons in fan forced CO, before they commented on its outcome. To see more about oven temperatures and macaron tips check my previous post on macarons.


Sunshine Macarons Recipe:


For the Macaron shells:
65 g ground almonds
100 g icing sugar
50 g aged egg whites (about two egg whites)
25g granulated sugar
Pinch of salt
Yellow and orange powdered food colour
Sumac powder (for garnish)

Lemon curd filling:

Zest of 1 lemon
1/4 cup lemon juice
1/4 cup sugar
1 large egg yolk


Method:


For the shell:


1. Firstly age the egg whites: Place egg whites in a clean bowl and cover lightly with a kitchen towel or tissue paper. It should not have any streaks of yolk in it. Keep it in your kitchen counter for 24 to 48 hours or up to 5 days in the fridge. Aging egg whites help to reduce its water content which is turn makes firmer shells for cookies.

2.Pulse the almond powder and icing sugar in the food processor or blender until fine and sift it into a large bowl to break lumps and aerate it. Discard any lumps or almond pieces. Keep it aside.

3.Whisk egg whites in a squeaky clean stainless steel bowl with no traces of fat in it, using an electric beater(medium speed) adding a pinch of salt.When the egg whites become foamy( like bubble bath) start adding granulated sugar slowly and beat on high until stiff glossy peaks.

4.Fold in the dry mixture to the meringue( beaten egg white) in two batches,quickly with a flexible spatula until well combined and no dry mixture is visible in the batter (it takes about 50 to 55 folds).At this stage your batter should be smooth, thick and shiny which slowly and ruggedly drips off your spatula as a ribbon when you lift it. Do not over mix once you have reached that thick batter stage.

5. Divide the batter equally and add orange food colour powder to one batter and yellow powdered food colour to the other and fold gently until combined. Take 2 plastic freezing bags, fold the bottom side up to the right, so that you can fill up the bag via the opening.Staple along the sides and fill each one with different coloured batter.Or you can use two piping bags and fill each with the different coloured batter.


6. Put those 2 bags carefully in the piping bag ,fitted with a round tip nozzle and  pipe your macarons on to the baking sheet lined with parchment paper (about 2 and1/2cm diameter) leaving two inches between them. It should spread a bit as it settles. The point should slowly disappear if the mixture is the right consistency. If not you could hit the bottom of the tray with your hand to smooth the point. Sprinkle sumac powder over them.


7. Let your macarons sit for about 10 to 15 minutes. This will depend on the humidity in your house and the day. Try touching the macaron softly, after 15mins. It should not stick to your hand.If it does keep for a few minutes more.


8. Preheat the oven(fan forced convection oven)to 180 degree Cand then reduce to 160 degree while baking and bake the macarons for 15 to 20 minutes until completely done.

9.Take them out and let cool on a wire wrack along with baking paper for 15 to 20 minutes. Peel them out carefully with an offset spatula and sort them out with same size shells.


Make Lemon Curd:
  • Stir together the lemon zest, juice and sugar in a small sauce pan. Bring to a simmer over medium heat.
  • Beat the yolks together in a medium bowl and temper with the hot lemon mixture.(that is: add a little hot liquid and quickly whisk in, then add a little more and whisk in)
  • Pour the egg mixture into the sauce pan and stir constantly over medium heat until the liquid thickens (about 5 minutes). Remove from heat and let cool completely.
Filling:


Take two shells of same size, invert one and pipe a small dollop of lemon curd on to the base. Gently press the other shell over it to sandwich the filling in between. Do like this for the rest of the shells and keep in fridge to mature before you eat it. Enjoy!

Sending this to Mac Attack #29 conducted by MACTWEETS


LinkWithin

Related Posts Plugin for WordPress, Blogger...