Nov 30, 2010

Vendakka Fry / Okra Fry / Ladies finger fry

              Desperate hours need desperate measures. After all the laundry done followed by the winter cleanings I was too exhausted to try anything harder. The December cold has already started climbing in though not as furious as it used to be. All I wanted was to curl up under a blanket and sleep off into the small hours. Couldn't even think about a long cooking session in the kitchen. It was with much laboured efforts that I managed to make my son sleep at last. I have always wondered why these toddlers are so reluctant to sleep when we adults would jump at the idea. If  only  I was a child.....


              So when the troublemaker was asleep at last I ran into the kitchen planning to throw up a very quick lunch. The side dishes are always the trouble. I leafed through my recipes for vegetarian side dishes. It was already time for the next purchase. All I had was some okras in the fridge. I cannot make curry with it because my hubby hates okra curry. So I searched for a different preparation and came to this recipe which looked quite satisfying.. and too simple. Just the thing..., I thought. At school, back in India Okras were taught as 'Lady's fingers'.. a name which hung in my memory due to its weirdness. May be that was why I always associated it with ladies and not men. And the fact that my husband hated it while I loved it, didn't quite surprise me. But I had to change my theory as I was intrigued when everything went hunky-dory with my better half when I fried it unlike the curry I used to make with it. This may be how tricks evolve... When your husband doesn't love the food you make, disguise it into another form and you would be astounded to find him eating out of your hands..( Now, keep my secret! ladies.. Don't disperse it ;) )


             Coming to the recipe...

Things you need:

Okra, washed and cut into thin slices along its length- 200g
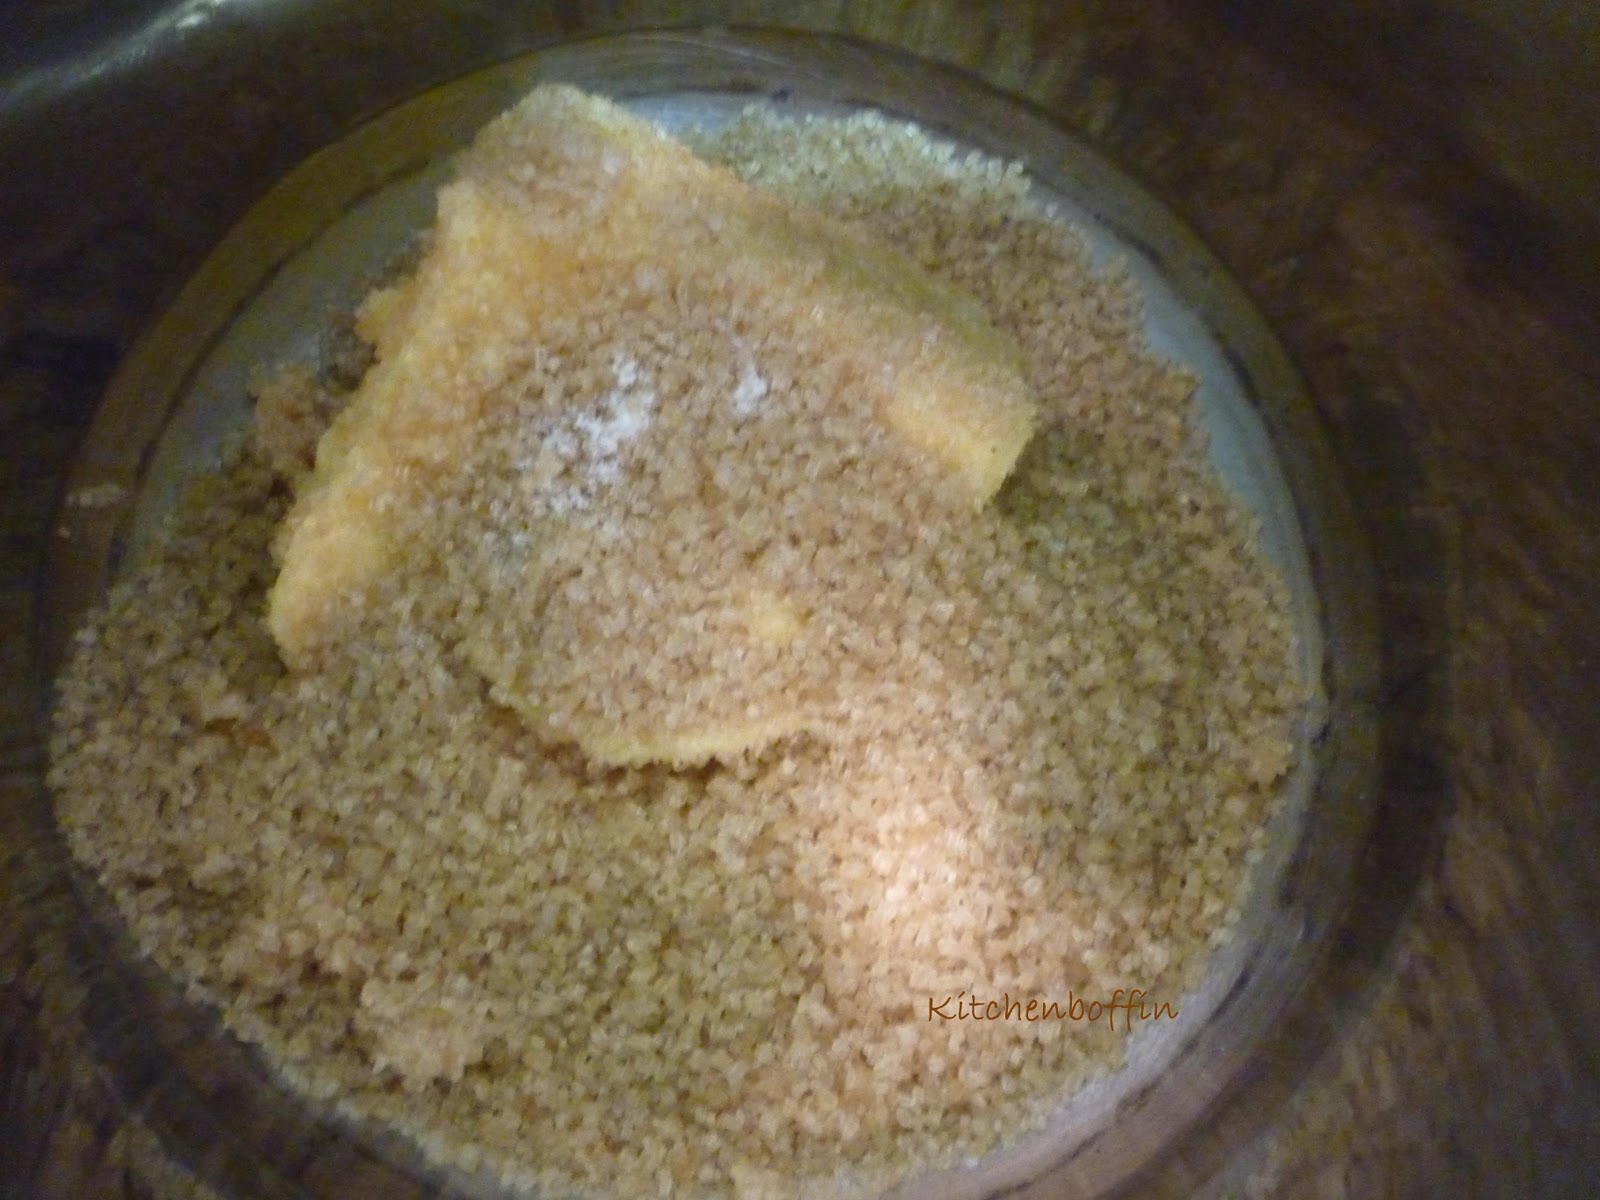
Red chilli powder                 -    1/2 tsp
Gram flour                           -    5 tbsp
Asafoetida powder              -    a pinch
Salt                                     -    3/4 tsp
Vegetable oil

Method:

    Mix all the ingredients except oil and apply evenly over the okra slices. Deep fry it in vegetable oil and drain on a kitchen tissue. Serve hot with rice and curry.
   
Recipe courtesy: Vanitha

Nov 28, 2010

Malabar Mutton Biriyani

                                          " Come delicious little dreams
                                      Become more and more yummy deals
                                                 So that you could heal
                                            All pretty unhappy kinda feel"


          I don't know why I am becoming poetic nowadays. I usually do when I am quite unparallely happy or totally devastated. Uncanny.. right? But that's what I am.. During the uneventful days I am quite normal. Unusual happiness or utter sorrow brings the Quixote out in me. No wonder most of the great poets were said to be a little out of their mind. Insanity brings outrageous rhythm to your thoughts which pours out as words with a complete twist. Actually I am pushed into such bizarre moods simply by the thoughts of home or by a homely food or hearing my son pronounce correctly a moderately difficult word without efforts. So what was it that let the Miss Loony loose in me this time?


        It was a very traditional goodie which actually send my palate (and mind) to extra ordinary ecstasy. Yes the 'Malabar Mutton Biriyani' is something which is more nearer to ecstasy.... if you are a biriyani lover. And like many others, I also think my mom makes the best biriyani . She makes it in the traditional "dum" procedure. 'Dum' is the process by which biriyani is cooked by retaining all its fragrance inside by sealing the lid with dough and keeping a weight on top of the lid so that the fragrant vapour is never going to escape out through any vent. Also hot embers of wood are distributed evenly under the pot as well as over the lid  so that the biriyani gets cooked equally over the top and bottom. So much to do for the traditional flavour lock technique... But I do not make it the traditional way because of lack of facilities in my little flat. I try to compensate it though, with resources I have... like aluminium foil to cover the vessel over which the lid is kept which is held intact by clothe pegs :) and keeping the whole vessel in the oven to get the 'dum' effect. Not bad in the outcome.  Actually it tastes almost its traditional cousin.
Here is the recipe...


Things you need:


For rice:
Basmathi rice or any other biriyani rice - 5 cups, soaked for 10 minutes and drained
Boiled water - 10 cups (it depends on the rice you use. some rice needs less than double the amount of water )
Salt to taste

For the masala:
Fresh  tender mutton  - 1 kg (cut into medium sized pieces, washed and drained)
Vegetable oil - 4 tbsp
Large onions - 5, sliced thinly
Ginger minced - 2 tsp
Garlic minced - 2 tsp
Green chillies, minced - 6
Tomato , sliced - 3
Turmeric powder - 1/2 tsp
Black pepper powder - 1/2 tsp
Garam masala powder - 2 tsp
Coriander powder - 2 tbsp

Fennel seeds - 1/2 tsp
Poppy seeds/ cus cus - 1/2 tsp
(Soak these two for at least 1 hour)

Grated fresh coconut - 3 tbsp (optional)
Lemon juice - of 1 lemon
Coriander leaves , sliced - 3/4 cup
Mint leaves, sliced - 1/2 cup
Salt to taste

Others:
Ghee / Clarified butter - 1/4 cup
Cashew nut - 50 g
Raisins - 50 g
Onion, sliced thinly - 1

Garam masala powder:
 4 Cinnamon sticks of 2 inch length
8 Cloves
8 Cardamom
1 Nutmeg
4-6 mace/ jathipathri
4 Star anise
1 tsp fennel seeds
Dry roast all these and powder. Store in an air tight container


Method:

Making the masala:
        Heat oil in a pressure cooker and add the sliced onions and saute until translucent. Add the minced ginger, garlic and green chillies and saute. Now add the sliced tomatoes and saute until it becomes mushy. Add the turmeric powder, pepper powder,coriander powder and garam masala powder and saute for another 2 minutes. Now add the lemon juice, salt and the leaves. Cook for a couple of minutes with the vessel covered. Meanwhile grind the soaked fennel an poppy seeds into a very fine paste. If there is difficulty grinding them add a little coconut to it and grind.Add this fennel poppy paste to the masala and saute. Finally add the mutton and mix everything well. Now close the pressure cooker and cook with the weight on in high heat. After the first vistle comes simmer the heat and cook for another twenty minutes and remove from heat.


Making the rice:
      Heat another heavy bottomed deep vessel and add ghee to it . Add a thinly sliced onion and fry it until deep brown and crispy. Remove it from the ghee and keep aside. Now fry the cashews and raisins in the same ghee until brown and puffed up. Take out from the ghee and keep with the fried onion. Now add the basmathi rice to the remaining ghee and saute until it starts becoming translucent. Add hot water to it . When it comes to a boil add adequate salt and simmer the heat and cook it by covering the vessel. Stir the rice occasionally to ensure uniform cooking. Remove from heat when all the water dries up and the rice is almost cooked.

Layering:
      Heat a deep round vessel and add the biriyani masala to it. On top of it add a layer of rice about 3 inches thick. Spread some fried onion, cashews and raisins on top of it. Sprinkle a little garam masala powder also. Above this add another layer of rice, then the onion cashew mix and go on until all the rice is layered. Now press the top layer with a spatula in such a way that the rice forms a dome shape. This helps in retaining the spicy vapour of biriyani inside the rice layers and gives the rice a nice fragrance. Now cover the top of the vessel with an aluminium foil and place the lid tightly on top. Secure the lid with clothe pegs or any other clips. Place the vessel in oven and cook at 160 degree C or gas mark 2 for 10 minutes or simmer the heat and keep it on the stove for another 15 minutes. Then remove from heat. Do not open until you start serving.

Serve:
      Serve hot with coconut chutney , curd or pickles and salad. Mix the masala and rice before serving. Garnish it with fried onions, cashews and raisins.

Nov 24, 2010

Banana Bread

                  This is one of the first specifically flavoured breads I started experimenting with.The fact that it is too easy to make than any other cakes elevates its fondness among beginners. And you need not wander anywhere out of your kitchen to collect the ingredients. If you have some over ripe bananas which you hesitate to throw out, then just mash them up and add into your cake batter and you have a delicious bread for the afternoon tea which your family is gonna love. I usually use the bright yellow Chiquita bananas . There are many virtues in using it.. like, they are easily available year round and very economical. And you can easily say whether it is adequately ripe or not from the skin colour. The skin tends to turn brown when it is very much ripe..

                The banana bread is thought to be more dry compared to a banana cake but mine turned out to be quite moist and soft.So I am still in doubt whether this is a bread or cake. I came to know that banana bread is a traditional bread of England and started baking with a child like exuberance. But I was also worried if I may be botched. The original recipe had mentioned adding treacle in it. But I baked it without adding treacle as I did not have it handy. The bread was not that dark with out treacle but it had the quintessential flavour of bananas and was incredibly moist. As I was baking it, the endearing fragrance of the cooked banana wafted out into the hall which brought hubby into the kitchen a couple of times. Usually he is unaware of what goes on in the surrounding world, drowned in news browsing in his computer..

                
Coming to the recipe...


Things you need:

125 g butter plus extra for greasing
150 g light soft brown sugar
2 eggs beaten
3 very ripe bananas mashed
250 g plain flour
1 tsp baking powder
1/2 tsp grated nutmeg

How to:


 Preheat the oven to 180 degree C/ gas mark 4. Grease a 1 kg capacity loaf tin and line the base with parchment paper. Beat the butter and sugar until fluffy and pale in colour. Beat in the eggs, a little at a time ,beating well after each addition. Add the mashed bananas to this mixture. Sift the dry ingredients together with a pinch of salt and then fold gently into the banana mixture.( It is important to fold the dry ingredients in gently with a spoon until just incorporated rather than simply stirring) Transfer the mixture into the prepared tin and bake for 45 to 50 minutes or until a skewer placed in the middle of cake comes out clean and dry. Transfer to a wire rack to cool. Serve the sliced loaf with peanut butter or whipped cream.

Nov 22, 2010

Chicken Chow mein / Stir fried chicken noodles

              I think I had become verbose about my love for Chinese dishes some recipes back. May be it's time for a wind up. Don't ask me for compensations if you are bored to death.. because it's a weakness in me that whenever I ponder about Chinese food, I become a lot more talkative about its deliciousness..., its vibrant flavours.. and its yum yum texture. I think the habit goes a long way back to my secondary school days when I was a boarding student at Thrissur, the cultural capital of Kerala. On the very few occasions our matron allowed us to go to the city, me and my friends used to visit a chinese restaurant in town which was called 'Ming Palace'. I had believed then that it was run by real Chinese people coz the waiters had chinky eyes and they never spoke malayalam. When we spoke to them in malayalam, they used to look at us as if they had a bone in their throat. So we dropped our mother tongue at MP's door and were relieved at finding  they understood English...


               There were a lot of dishes we were too much fond of at MP but Chowmein and American Chopseuy were my favourites. For Chinese people, they served the food with chopsticks  and for us they gave spoons and forks. It was sheer curiosity which prompted us to ask for chopsticks one day while dining at MP. They gave it to us with a queer look. We didn't understand what it meant until we started eating with the chopsticks.. After several attempts, the chopsticks came off easily and the food remained in the plate very adamantly. Seeing the delicious hot food and feeling its invigorating smell, our gastric juices had already started boiling vehemently in our stomach and we gave up our attempts at using chopsticks and asked for the spoon and fork again. It was one of my friends who commented, " Well, If curiosity didn't kill the cats, it would certainly have starved them" :)

              Home made noodles were never like the restaurant ones. They were mostly made with the ready to cook noodles available in market with taste makers provided with it. I must admit I was fond of it too but lately I have avoided making it because I am scared of Ajinomoto. Ajinomoto which is also called 'Mono Sodium Glutamate', had never been in good terms with me ever since I found out its health issues. We avoid each other like plague..  :) If you ask me, "Then, how about restaurant food?"  Well, I always like to think positive. Like..... the restaurant cook is too kind and never add Ajinomoto in the food he gives me ;) So I started experimenting with the plain noodles at home and was quite taken by surprise as it turned out to be almost the same taste as that of the restaurant ones (without adding MSG!). So may be, my optimism have some hope after all...

             'Chow mein' is the Chinese name for stir fried noodles. You can replace the chicken with beef or canned tuna, or any kind of mushrooms if you are a vegetarian. Here is the recipe..


Things you need:  

250 g wonton noodles / spagetti / any other type of plain noodles
4 cups of water
1 cup of shredded cabbage
1/2 cup of carrot cut into thin long strips
1/2 cup of  bell pepper, cut lengthwise
3 cloves of garlic, sliced
1 onion sliced
1 stalk of celery
2 stalks of green onions
2 eggs
250 g of boneless chicken cut into small pieces
2 tsp of black pepper powder
2 tsp of soy sauce
2 tsp of oyster sauce
Salt to taste
6 tbsp of cooking oil

Method:

          Boil the noodles as per instruction on package in 4 cups of water until well cooked and tender. Drain on a mesh and immediately pour cold water over it to stop the cooking and add a teaspoon of oil to avoid  sticking. Heat a large wok and add 4 to 5 tablespoons of oil. Add the garlic and saute. Then add the onions and saute until transparent. It need not turn golden. Then add the carrots, cabbage, bell peppers and celery one by one and saute in medium heat. Add adequate salt and pepper powder. Meanwhile you can cook the chicken in another pan with 1 tablespoon of oil and adding adequate salt and pepper powder. Cook the chicken until all the water in the chicken dries up. Add this to the vegetable mixture and mix well. In the same pan heat a little oil and scramble the eggs in it adding adequate salt and a little pepper powder. Add this to the veg-chicken mixture. Finally add the cooked noodles along with soy sauce and oyster sauce and mix well by tossing on medium heat. Garnish with green onions and serve hot.

Nov 18, 2010

Eid Celebration and the Garden Barbecue

             It was Eid-Al -Ad'ha... another reason to celebrate.. Belated 'Eid Mubarak' to all my readers. 

             Well I was too busy to post anything on Eid. The celebration started with going to the 'Eid gah' or Eid gathering in open air where we performed the Eid prayer..., met family and friends and exchanged greetings... Then there was the  ritual slaughtering  of goat in memory of the sacrificial mind of the great forefather and Prophet, Ibrahim(A)... later on visiting friends and family..

            It was on the second day we went for barbecuing with friends to a public garden.. The climate was pleasant and the night was beautiful... It was real fun barbecuing in the garden with all the chatters and delicious smell of cooked meat coming up..The event was decided in haste and we didn't have ample time to marinate the meat. I had loads of mutton in my freezer from the Eid slaughtering and so I took some marinated mutton and my friends brought chicken.. So the menu was diverse. We ate them with pita bread and home made middle eastern garlic sauce or Thoom, the recipe of which I had posted earlier. Unlike usual, we women decided to do the bbq grilling. Here are some pics from the grilling..

The marinated mutton ready to get on to bbq.. It was a simple marinade with ginger garlic paste, ground green chillies, lemon juice and salt. I couldn't risk losing time on cutting em to smaller pieces.. that's why it looks a little weird.. :)

Lighting the coal..

The chicken to be cooked and the half cooked mutton


                                                     chicken and mutton are almost done..


                                            ....the cooked chicken ready to be eaten

By the time everything was cooked, everybody had gone loony with hunger... So, do I need to say the food vanished into thin air, the moment it was transferred to the serving plate? :) No wonder they say, 'hunger is the best taste maker'... grilled chicken and grilled mutton had never tasted this yum before..

Nov 15, 2010

Coconut Cake with coconut and cream frosting

                      There must be a stage in every baker's life when he finds out he can do something which he had thought to be impracticable in the past. And after you do it, you gets shifted to the upper class from where you would be able to look down to the past.. to the stage when you had feared to try that 'something', thinking it has been meant for the experts, and smile in silent amusement when others admire you for being an expert .. for being a 'knower' amidst all other 'unknowers'. And your heart winks at you joining in your secret and asks you, "After all it was not a herculean task.. It was quite easy, ain't it?"

                     Do I sound like I am blabbering? Well, what I was gonna tell you is .. I was also in the ignorant people's category on how to make an iced cake or how to prepare icing for a cake. When I used to gawk in awe at the iced cakes or pastry cakes in the shops, I had always thought it was beyond me and can only be done by very professional bakers with much sophisticated utensils and had never dared to experiment. I don't know what evoked the dare devil in me and just kept on insisting "why don't you try.. what if you succeed?" and I got the bit between my teeth.. And guess what? I couldn't contain my mirth when it turned out, not too bad and hubby declared it bitchin'..


                  It was only coincidental that I tried the icing on a Coconut cake. I had been planning to make one for some time and what actually happened was it got caught in between my icing adventure. That was how it turned out to be an  iced coconut cake. I was so engrossed in my icing experiment that I forgot to take pictures, silly me.. :) Only after the cake was done, did I remember capturing it in the lens and so.. for the time being you have to do with the finished photos. Later on I shall give you a detailed picture description of icing on my next venture. Did I tell you I sprinkled some desiccated coconut all over the icing so that it actually became a coconut icing..? And I inserted some chocolate chips too as a decoration. You could leave it as such or do some decoration. By the way coconut cake is more yummy than any other cakes..every bit of it crunchy with coconut. Me being a coconut lover should have known that. And the cake is particularly soft n moist too.Coming to the recipe..

Things you need:

For cake
2 cups self raising flour/ white flour
2 tsp baking powder
1/4 tsp salt
1 cup butter at room temperature
1 cup powdered sugar
4 egg yolks, well beaten
1 cup milk
1 tsp vanilla extract
1 cup shredded coconut
4 egg whites, well beaten

For frosting
2 egg whites
1 1/2 cups sugar
1/8 tsp salt
1/3 cup water
2 tsp light corn syrup
1 tsp vanilla extract
1/2 cup dessicated coconut( to sprinkle over frosting)
Chocolate chips (optional)


Preparation:
           
Cake:
           Measure the sifted flour into a bowl. Add baking powder and salt. Sift these ingredients three times. In a mixing bowl cream butter thoroughly; add sugar gradually. Continue creaming until light and fluffy. Add the beaten egg yolks and beat well. Add flour mixture , alternately with the milk, beating well after each addition.Stir in coconut and vanilla. Fold in egg whites gently. Bake in greased 8 inch pans at 350 degree F for about 30 minutes or until a wooden pick or cake tester inserted in the center comes out clean.Allow to cool on a wire rack.Makes two 8 inch layers.

Making the frosting:
          Combine all ingredients except  vanilla in the top of a double boiler over boiling water. Beat with electric whisk for about 7 minutes or until mixture will stand in stiff peaks. Beat in one teaspoon vanilla extract.

Frosting the cake:
          Spread the frosting evenly all over the sides and top of the cake with a small spatula. Sprinkle dessicated coconut all over the frosting. Press with your fingers on to the sides. Insert chocolate chips for decoration.  
    

Nov 11, 2010

Meen Mulakittathu / Red hot Kerala fish curry

                Is there anything more tempting than a red hot fish curry... as far as spicy food lovers are concerned? This post is for Chini, a blogger friend who had asked for a really authentic home made fish curry... red hot - she had mentioned that. This is a recipe I should have posted much earlier but somehow had procrastinated. I have always preferred home made fish curries to the restaurant made ones because the restaurant types are mostly benign and usually lacks the mesmerising and fierceful (I don't know why I use both words at the same time..) blend of flavours. You should know what I mean when you are having one and your eyes and noses are running like hell... but you still cannot stop having more :)


              Well, that is what home made Kerala fish curry is about. So those who are less tolerant to spices, or weak at heart may better keep away.. or you wouldn't know when you will dissolve into tears :) Well, if you ask me " Is there any option to make it less hot without sacrificing the taste?", yes there is! Substitute the red chilli powder with Kashmiri chilli powder. This oughtta save your tears.. because Kashmiri chilli powder is less hot compared to ordinary Indian chilli powders but gives a very beautiful scarlet hue to your curry. And the greatest tip for the traditional taste is to cook it in an earthen pot and would taste even better on the next day or evening. So.. are you ready to go? Then grab your resources! Here is the recipe..

Things you need:

1/2 kg fresh pomfret or any other fish;washed , drained and cut into pieces
1/4 tsp fenugreek seeds
8 to 10 shallots, sliced
2 to 3 cloves of garlic, sliced
2 medium sized tomato, chopped
1/2 tsp of turmeric powder
2-3 tbsp of red chilli powder/ kashmiri chilli powder if you are on the low spice level
2 bells of gambooge or 'kudampuli'
2 cups of water
Salt to taste
3 tbsp of coconut oil
1 sprig of curry leaves


Method:
       Soak the gambooge in 4 tbsp of warm water for ten minutes. Heat a heavy bottomed earthen pot and pour 2 tablespoons of oil to it.Add the fenugreek seeds and saute until brown. Then add the shallots and garlic and saute until transparent. Now add the turmeric powder and red chilli powder and saute. Add the chopped tomatoes and saute until the tomatoes become pulpy and the oil starts to surface. Add water and increase the heat. When the gravy comes to a boil, add salt and the soaked gambooge along with the water. You can also use ordinary tamarind instead of gambooge. Now add the fish pieces and cook in medium heat covering the pot. Remove from heat when the fish is cooked and gravy starts to thicken. Sprinkle the remaining coconut oil over the surface. Garnish with fresh curry leaves. Serve hot with rice or chapattis.

Nov 10, 2010

Lemon Pudding

          It had bugged me for some time  how I could incorporate lemon into a pudding or ice cream. The fact that lemon curdles milk, irked me and kept me from experimenting... Nevertheless, the thought that the tangy flavour of lemon would be too good in a pudding, took my fancy. It was one of my friends who suggested that we might add cold milk because most of the fermentations  and curdling processes happens in a particularly warmer condition or climate. In fact, I have been peeved more than once, when my batter for 'dosha' didn't ferment in cold weather. That really piqued my interest and nudged the sleeping scientist in me to awakenness. So I added cold milk taken right out from the fridge and Hooray! you have a very handsome lemon pudding... no signs of curdling..! I also took great care to add milk at the last moment, just before cooking. So there.. this pudding is too easy to make and has a very distinguished flavour.


Things you need:

1 cup of cold milk
2 medium sized eggs beaten
3 tbsp lemon juice
1/2 tbsp lemon zest/ lemon skin scraped
1 1/2 tbsp white flour/maida
6 tbsp sugar
1 tsp butter

Method:

   Grease a round shaped vessel with butter. Beat the eggs in a bowl and add lemon juice to it. Add lemon zest and beat again. Dissolve the sugar in 1/2 cup of cold milk and pour it into the egg mixture. Dissolve the white flour or maida in another 1/2 cup of cold milk without any lumps and pour this into the mixture. Mix everything well. Pour it into a buttered bowl. Cook by double boiling method by keeping it in a closed vessel with water for half an hour over low heat. Take off from heat and serve with caramel syrup after cooling. Decorate with lemon slices. Preparation of caramel syrup have already been explained in Caramel Banana Pudding recipe. But you need to add more water so that you have enough syrup for the pudding to bath in...


                                                                    Njoy.... :)

Nov 8, 2010

Tabouleh

               
                I had never thought I could enjoy eating a lot of leaves raw until I made aquaintance with the myriad of green rich salads in the middle eastern cuisine. Back in India, vegetables are mostly eaten cooked and the few green leaves which are consumed raw are usually served as garnishes or toppings.. It had never occurred to me that eating leafy rich salads can be satisfactory or even delicious. I was taken totally unawares by the diversity in flavour and unique ambeance of the different leaves I saw in the Arab markets. Parsley was one of them which actually imparts a distinct smell and flavour to the food that it is an ingredient in many delicious salads and marinations.. In fact it is awesome, even as a garnish for fried chicken or fish. No wonder it is considered as the most popular herb in the world.


             Tabouleh is a middle eastern salad recipe which I got familiar with recently and has parsely as the main ingredient. It is definitely yummy with the lemon and olive oil dressings and the richness of bulgar, and a beauty on the dining table with its vibrant colours. If you are actually on a low fat diet it can serve as a whole food too with the 'carbs' in bulgar and the vitamins A and D in the parsley, not to mention the nutritious richness of tomatoes and cucumbers.. So, off with the recipe...

Things you need:

1/2 cup bulgar( bulgar is a kind of broken wheat)
2 medium tomatoes
1/2 English cucumbers
1/2 green pepper
3 green onions
1 cup freh parsley, finely chopped
2 tbsp mint, finely chopped
1 lemon, juiced
3 tbsp olive oil
Salt and pepper

Method:
          Cook the bulgar for half an hour in boiled water until done. Drain in a fine mesh sieve and press out the water. Chop the tomatoes, cucumber and green pepper in the same size. When dicing the tomatoes first seed them. Finely dice the parsley and mint. Chop green onions very thinly. Toss everything  in with the dressing and mix well. Add adequate salt and pepper.

Nov 4, 2010

Butter Cookies

"Cookies are made of butter and love." 
~Norwegian Proverb
 

             "I love you only when you give me cookies". You should have seen his face when he said that. I came across the video when I was searching for educative Islamic cartoons for my son. The little plump guy was perched on top of his high chair and his mom was asking him, "Do you love me?" and he replied, damn serious, "Yes, but not always. I love you, only when you give me cookies." How fast he made his point! If every grown up man and woman had been this straight forward, our life in this planet would have been far less complicated :)

              That was when I recalled my old butter cookie recipe. I thought of trying it to appease my little nagger. Well, he is not yet two and the words in his vocabulary are not yet comprehensible to others.. but we being his mom and dad manage to translate the words in his dictionary. Here are some examples...
for biscuit he says 'fa'; for playing, 'aputh aputhi'; for water, 'blum blum'; for car, 'kal'... But he is more expressive in his expressions. When he likes the food I give him, he goes off to bring his chair, drags it near me and sits in it, to get more. When he doesn't, he goes off and never comes back even if I call him... :(

             In fact he is the maiden 'test taster' who checks my food the very first time. So I was eager to find out how my butter cookies turned out. After having a bite he went off... I looked on in anticipation... and there he was, returning with his chair and I fought a grin. After eating one, he hugged me as if saying.. "Mommy, I really love you when you give me cookies." So friends.. Don't you think it is the finest way of appreciation... The most glorious of thumps ups..?  And after that how can you ever stop making cookies..? That's how I became an obsessive butter cookie cook :) You know what? Butter cookies are not hits in the kids gang alone. Anybody gets hooked after it melts in the mouth. Let me tell you how I did the job..


Ingredients:

 180 g unsalted butter at room temperature
 28 g castor sugar
 1 tsp vanilla essence
 A pinch of salt
 130 g plain flour
 105 g corn flour

Method:


                Place the butter and castor sugar in a mixing bowl and whisk in medium speed. Then increase the speed. Add the vanilla essence. Add flour little by little, setting the mixer to low speed. Then add corn flour slowly. Scrape the dough completely from the mixer and keep in refrigerator in a covered vessel or wrapped in cling film for at least two hours. This is important because it would be difficult to work with the dough if it's not cooled adequately. Then take it out and transfer to a lightly floured board and knead a few times, just until the dough smooths out. Roll it out into a dough of about 1/4 inches thick.Then shape the biscuits using cookie cutter and transfer them to a baking tray using a knife. Preheat the oven to 160 degree C. Bake for about 15 minutes until the sides start turning golden. Remove from the oven and allow to cool on a wire rack. Store in an air tight container. Serve with warm milk or tea. 

Nov 1, 2010

Thoom / Garlic Sauce

           
         The middle eastern cuisine is popular for its innumerable verities of dips and sauces. They give an elevated interest to the unique grilled and smoked preparations of chicken and mutton, they have. This particular dip which is also known as 'Zait B Thoom' grabbed my good old attention (totally), the very first time I tasted it. Well, what came to my lips then where.. " creamy.. soft..savoury! mmm.. totally irresistible". It could be pedigreed as a colonial cousin of mayonnaise, but not as tangy. Quite mild and humble for the flavour sake... and healthier too coz it uses egg whites unlike yolks in mayonnaise. Still, how it charms the taste buds so, is a myth.

          The processing is more mythical (if you do not think scientific). The way each globule of oil incorporates in to each drop of liquid to become a totally different emulsified texture is a real wonder. Those  who are not familiar with the theory of emulsification would gape like an idiot as to how the mixture could get thicker and thicker as you go on adding oil. Your simple pretty logic tells you, the mixture should get thinner and watery as you add  liquid to it...

          While I was strolling through the web, I came across many sites which discusses the scientific theory behind the formation of mayonnaise. It was real fun seeing people 'seriously' discussing about the volume of the cylindrical vessel and the velocity of the whisk acting together to form a wonderfully uniform emulsified mixture... So who says, there are no scientists in kitchen? ;) Now let me share some of my own 'scientific' findings.. While you add oil you must add it little by little in thin streams or drops. If you add a big amount all of a sudden, you would risk breaking the emulsion. The oil would then float on top as a different layer. Also, your whisking should neither be too slow nor too vigorous. That would  break the emulsion too..
Let's have a look at the recipe..


Things you need:                                                   
4 egg whites
3 cloves of garlic
2 tbp vinegar
3 to 4 cups of vegetable oil or any salad oil
Salt to taste 


Method                                                                                      
          Grind the garlic finely with a dash of salt in a mortar.Whisk or blend together the egg whites and ground garlic until frothed up. Add the vinegar and mix well. To this mixture add oil little by little while you continue whisking in medium speed. Make sure the mixture is completely emulsified and uniform before you pour more oil. If you are using an electric whisk keep the speed low. You can whisk in high speed before adding oil. You will note the mixture thickening as you go. Go on adding oil and whisking until the desired thickness is reached. If it hasn't reached the desired thickness even after adding the measured quantity, you can add more until the desired thickness is reached.

Serve:
Use with peta breads or grilled chicken. Goes well with Tantoori Chicken too. Refrigerate after usage. It can be stored in the refrigerator for about a week.


LinkWithin

Related Posts Plugin for WordPress, Blogger...